

Email takes up a lot of time.
The average white collar worker spends more than 1,000 hours a year reading and answering emails, according to the Washington Post. That’s nearly half the time you spend sleeping!
It’s even harder to initiate sending emails, especially if someone doesn’t reply back right away… but this doesn’t need to be a problem anymore.
Our free Gmail Auto Follow Up Chrome extension is easy to set up, and automatically sends all of your follow up emails for you.
It’ll save you time, stress, and precious space on your mental to-do list. Here’s how it works:
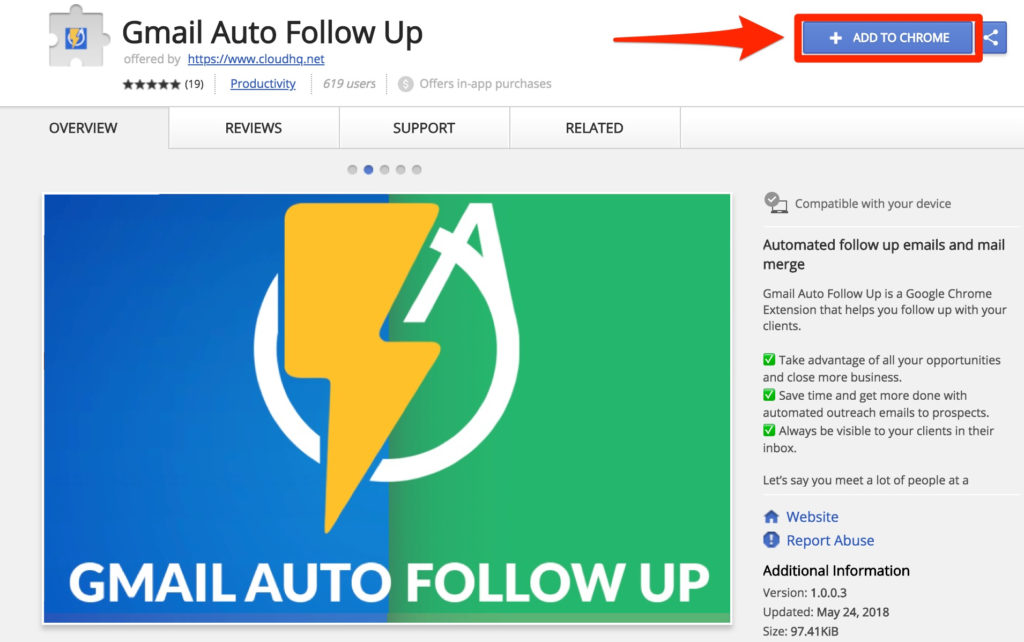
Step 1: Install the “Gmail Auto Follow Up” Google Chrome extension
Just visit the Chrome Store, and click the blue “+ADD TO CHROME” button in the top right hand corner of the window:

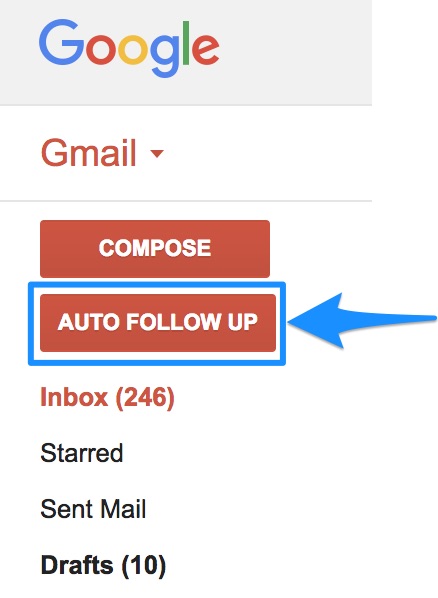
Step 2: Get Started With Automated Emails
Once you’ve installed the extension, your Gmail inbox will have a new “AUTO FOLLOW UP” button just beneath your regular “COMPOSE” button. Click here to get started.

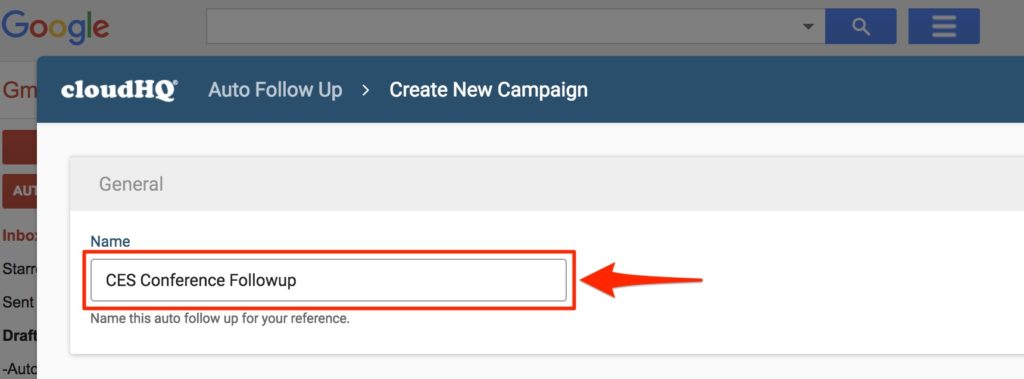
Step 3: Set Up Your Campaign
Start by naming your campaign. This is just for your own reference; nobody will ever see it but you.

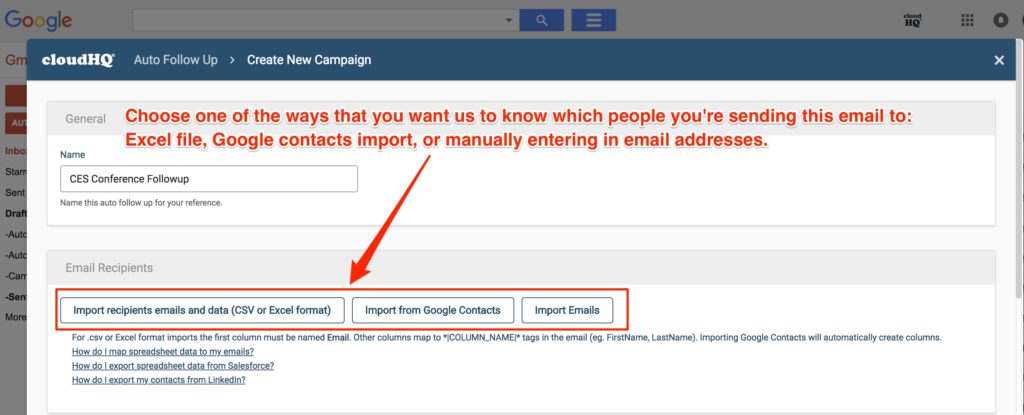
Now select who you’re going to be sending your emails to. You can:
- Import a list from Excel or a .csv file
- Import contacts directly from your Google Contacts
- Manually enter email addresses.

Step 4: Create Your Email
Start your email by creating your subject line. It should be something punchy that relates back to the reader, like including a common event or friend’s name.

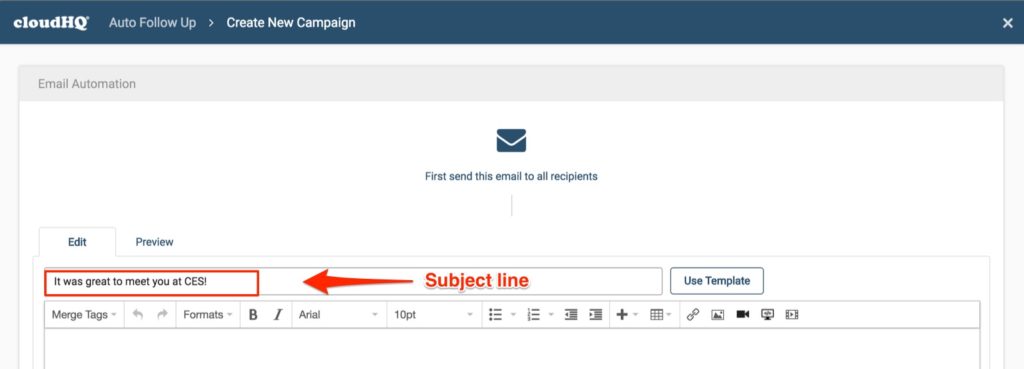
Once you’ve decided on your subject line, you can write your email message in text as you normally would.
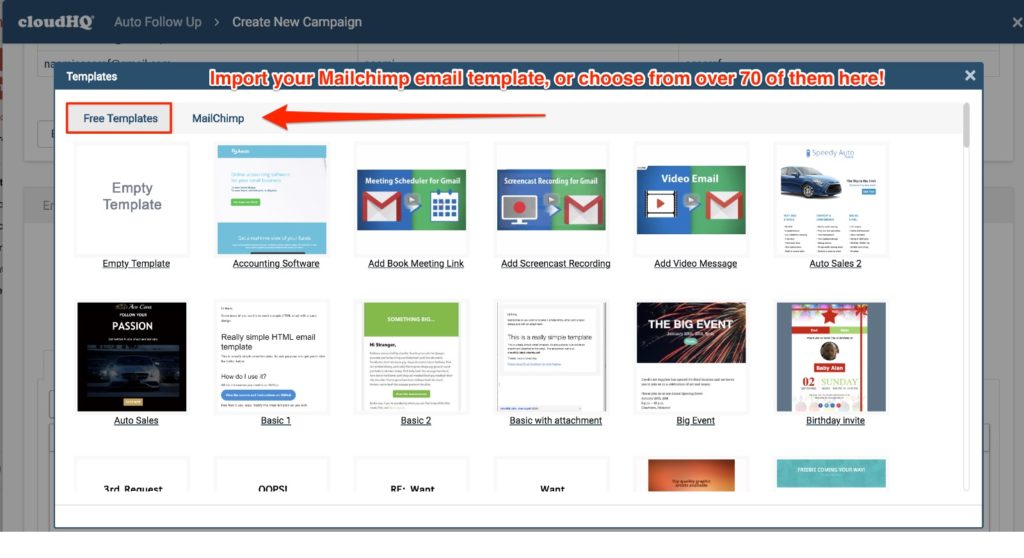
Email Templates:
You also have the option to personalize a professional-looking email template by clicking on the “Use Template” button to the right of the subject line. There, you’ll find a wonderful selection of over 50 templates to choose from. And if you have any templates that you already created in MailChimp, you can easily import them just by clicking on the “MailChimp” tab.

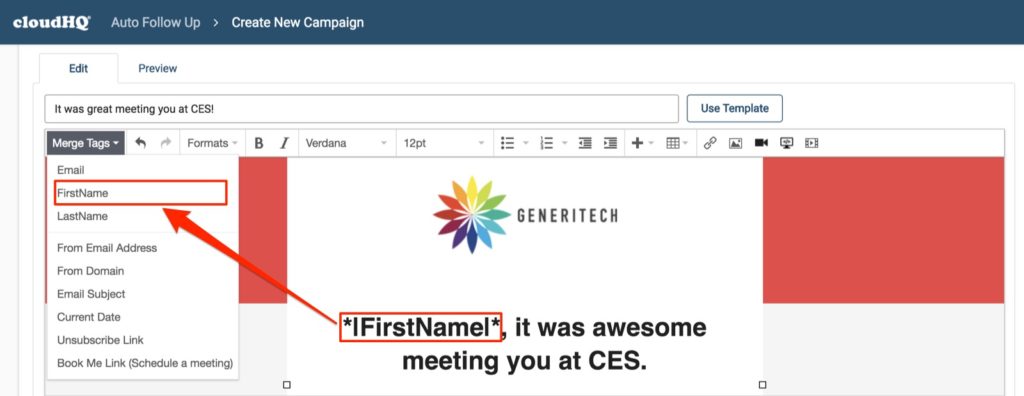
Merge Tags:
If you can, it’s a really good practice to personalize your email messages by using first names in your greeting.
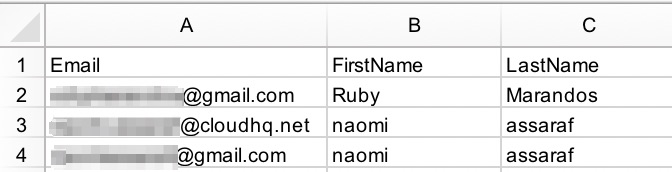
When you upload your contacts, your .csv file or Google Contacts usually has first name information for you. If you entered your email recipients manually, you might want to create a simple sheet in Google Sheets or Microsoft Excel, starting with email addresses in Column A, first names in Column B, and any other pertinent information that you might want to add in additional columns. Here’s what my test list might look like:

If you really want to get crafty with merge tags, any of the other pertinent information that you include in your .csv file will show up under the “Merge Tags” tab in Gmail Auto Followup. Then you can include that personalized information in your email; some ideas might be: birthdays, assistants’ names, etc.
To keep things simple, I’m using someone’s first name to personalize my email. By clicking on the “Merge Tags” tab, and then on “FirstName“, you’ll accomplish that for each of your email contacts where you have a first name.

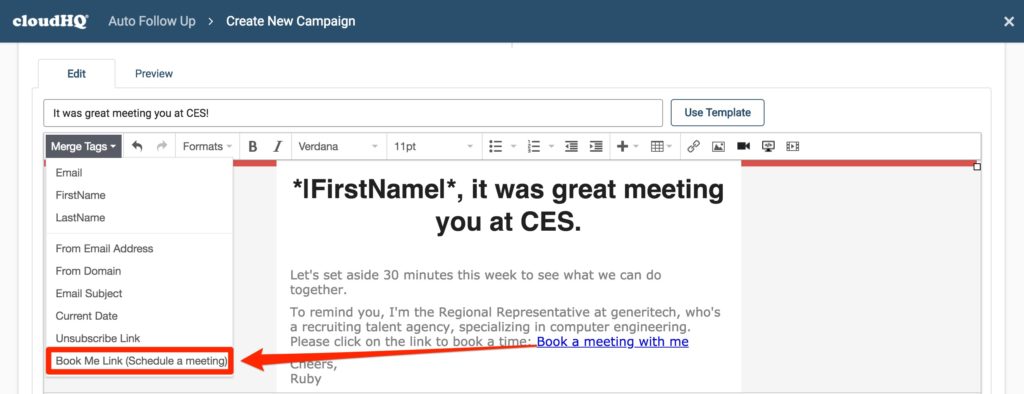
To further personalize your email, you can create a meeting scheduler link, so that your email recipients can book a meeting time with you right out of your Google Calendar. Look at how seamless this is:

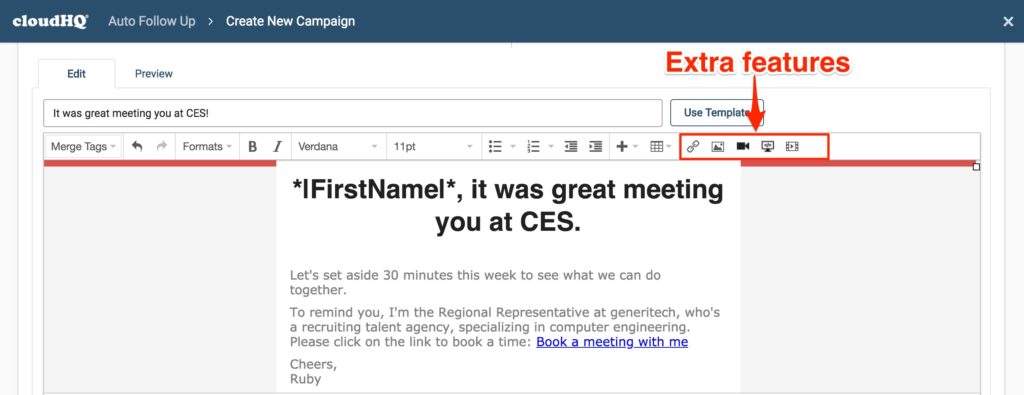
You’ll also have 5 extra features you can take advantage of in each message:
- Include a link to a previous email for reference
- Include a new image, or edit any of the existing ones
- Include any new media
- Record a video of yourself talking, and embed that video in your email in 3 clicks
- Record a screencast to show what you see on your screen; which is great for showing how to do something online.
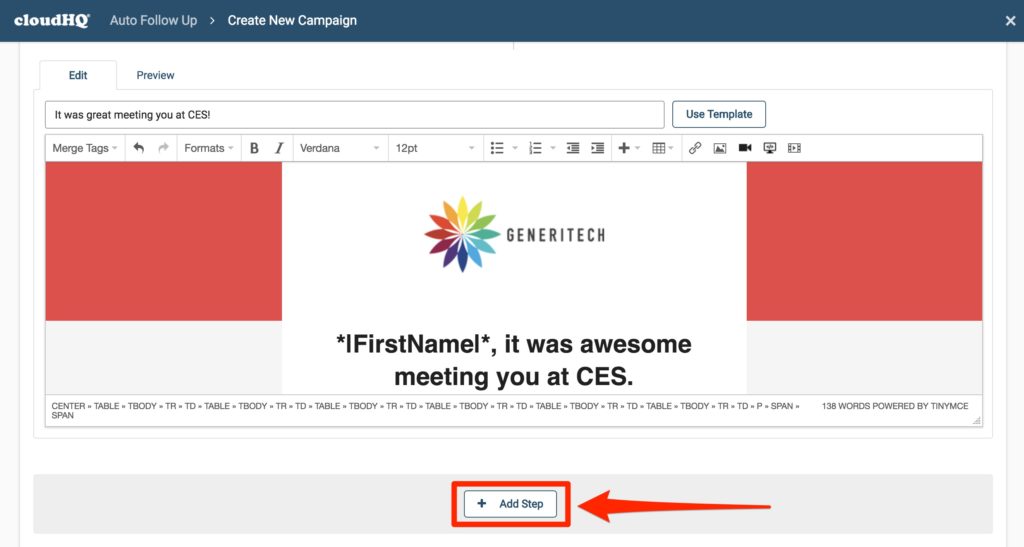
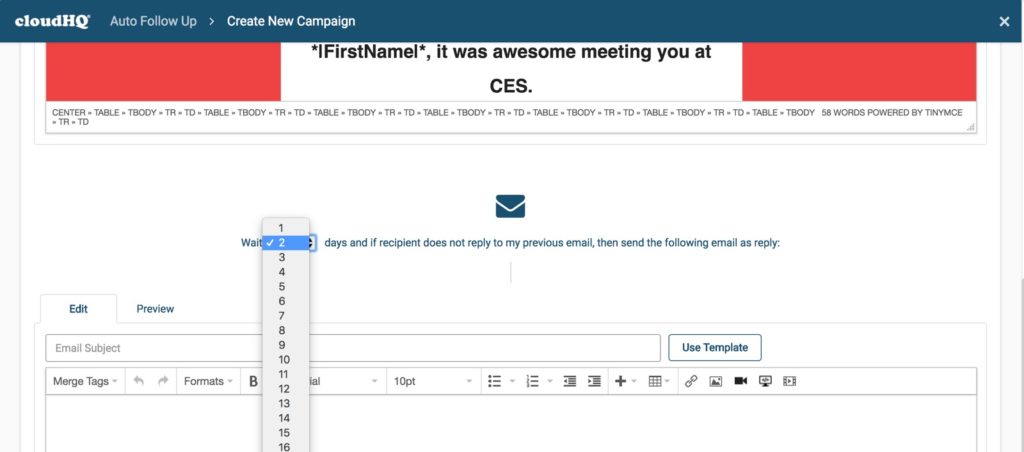
Once you’re done with your first email, which should look pretty good right about now, scroll down to set follow up rules by clicking on “Add Step“. If someone doesn’t respond to your initial email, these rules will automatically send follow up emails for you.

You can set up as few follow up emails as you want, or you can send up to 10. Whatever you decide, we suggest sending a minimum of at least 3 emails.
After setting up the number of days to wait before your next email, you can create your follow up emails just as you created your first one.

If a recipient responds to an email that you sent them, great! They won’t receive your next automated email.
For those that didn’t respond to your email, which will likely be the majority of people, your follow up emails will continue to get sent out until your contact responds back to you.
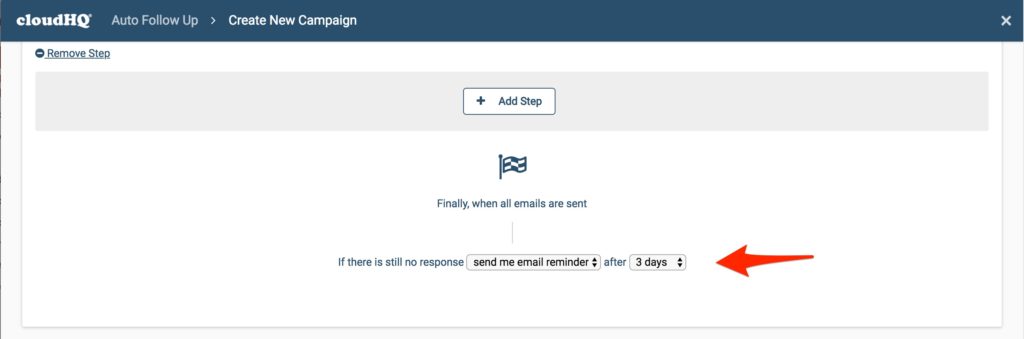
Once you’ve created all of your follow up emails that you want to send someone, you can choose whether or not to set a reminder for yourself after your very last email gets sent. It’s usually a good practice so that you can measure which email messages might have worked better for you.

Final checklist before you’re ready to send your emails:
- Add a BCC address for any CRMs that you might be using (like Salesforce or SugarCRM)
- Check off the user agreement
- Click either “Send” to start sending it out immediately, or “Save for Later” to save it for when you’re ready.


And that’s it! Your follow up emails will automatically be sent as scheduled.
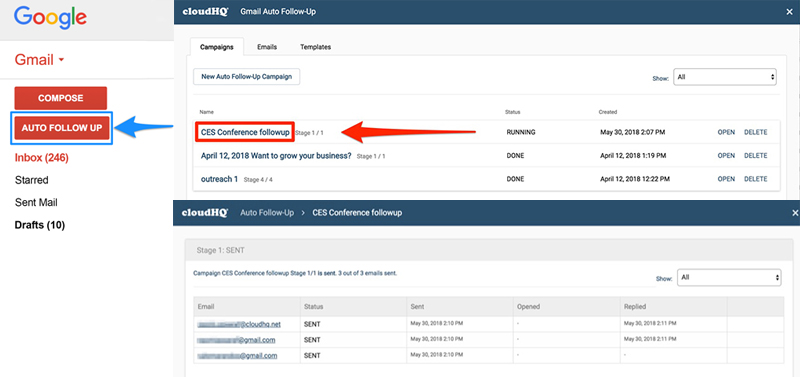
You can also track who’s opened your emails with our email tracking feature. Just click the “AUTO FOLLOW UP” button in your inbox, and then click on your email campaign to track who opened your emails, or who may have replied back.

Doing all of the legwork in advance will make you look very professional, and your email recipients will likely thank you for your persistence. Because many people are overwhelmed and need email reminders, this tool lets you guide them through your process until they’re ready to speak with you.
Gmail Auto Follow Up is great for:
- Marketing and Salespeople to follow up with prospects
- Lawyers or Accountants to remind clients to send important information
- Realtors who want to broadcast their latest property on the market to potential buyers
- Teachers to remind students to turn in work, or parents to sign papers or schedule meetings
- Recruiters who want to followup with candidates
- Job seekers who want to follow up with prospective employers (tip: use the video email feature to make your candidacy stand out)
- Event Planners to send RSVPs or firm up vendors
- Anybody who wants to appear persistent, attentive, on-point, or just doesn’t want anyone to know that they can be forgetful sometimes.
To get started now, just click the button below:
