

If your workplace uses Gmail for primary correspondence, chances are you have an overflowing inbox and no strategy or plan on how to easily access important emails. Relying on your memory and the search function can serve for only so long and to make your workflow more efficient, you have to organize your emails into different categories. This will not only help you make some sense of the cluttered mess of your inbox, but it will also help you work efficiently and decrease the stress you feel every time you open your inbox.
In order to organize your emails and avoid chaos, utilizing the labels feature in Gmail is a must. In this article, we’ll explain how to create a Gmail label system that helps avoid chaos and provide tips for making the most of this feature.
What Are Gmail Labels?
Gmail Labels is an incredibly helpful feature that enables you to categorize your emails in whichever way you like. Labels work similarly to folders in other email systems, but with some key differences. While folders are limited to one level of organization, labels can be nested and applied to multiple emails, making it possible to categorize your emails in multiple ways.
Labels in Gmail are displayed on the left side of your inbox and can be used to sort and filter your emails based on specific criteria. For example, you could create a label for “Work” and apply it to all of your work-related emails, making it easy to find them when you need them.

5 Steps to Create a Highly-Efficient and Easy Gmail Label System for Your Inbox
Once you have acknowledged your inbox problem, it is time to get working and plan out a cohesive Gmail label system that is specific to your inbox and your needs. Here are all the necessary steps you need to take to create a Gmail Label System:
1. Think About Your Labeling Needs
The first step in creating a Gmail label system for yourself is to think about the emails you receive and how you would like to organize and label them. Consider the type of emails you receive, how often you receive them, and how important they are to you. For example, you might create labels for personal emails, work emails, bills, newsletters, and emails related to your purchases.
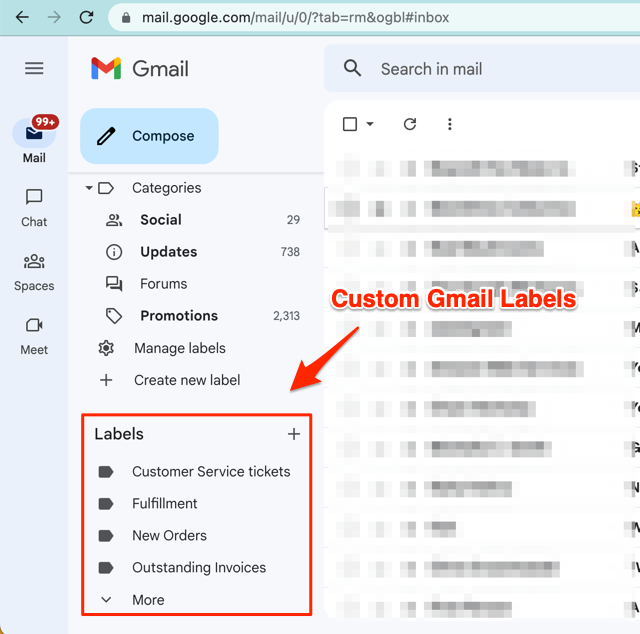
2. Create Custom Gmail Labels
Once you have hashed out a solid labeling plan for your emails, you can start creating your labels. The feature is incredibly easy to use and you can organize your inbox with just a few clicks.
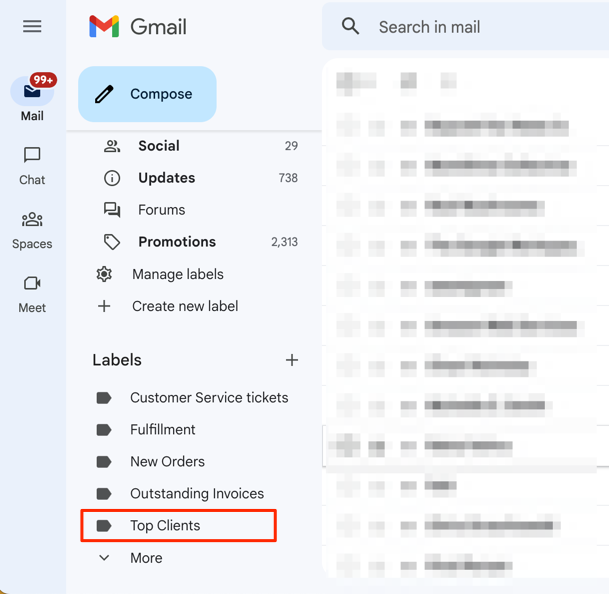
- Click on the “+” button on the left side of your inbox next to Labels.

- Give your label a name, and click “Create.”
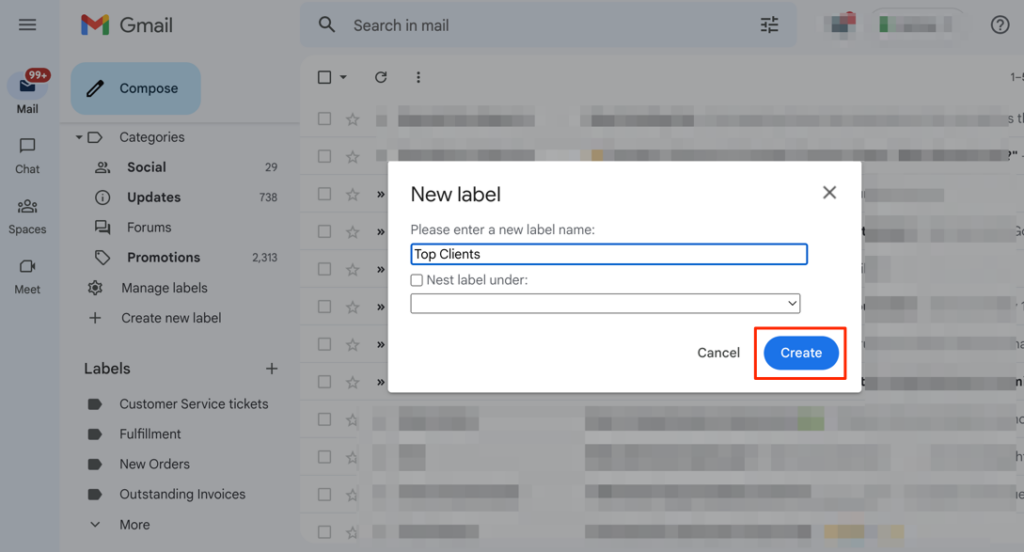
- Your Gmail Label is created! Just repeat this process for each label you need.


3. Auto Label Your Emails
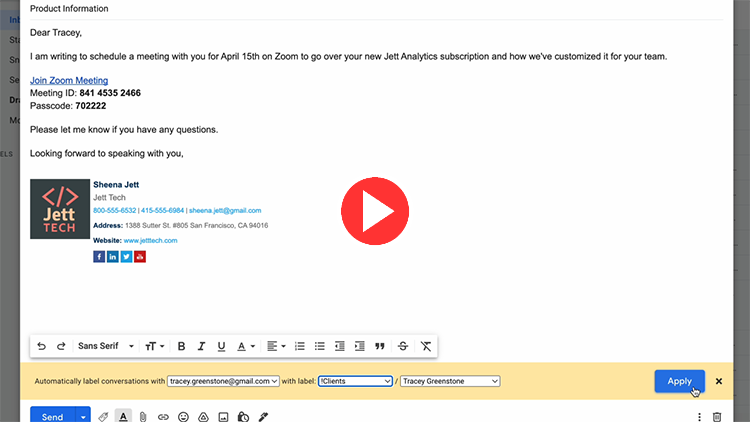
Once you have created your labels, you have to add the appropriate emails to those labels. Gmail provides you the option to add an email to a label manually or create a filter that will automatically add an email to a label based on criteria such as sender, subject, or keyword. Sometimes people get confused with filter, so we made it easy by offering you an auto email label filter app that’s free and easy to use. To apply labels manually, simply select an email, click on the “Labels” button, and select the label you want to apply. Alternatively, you can utilize Gmail Auto Label by cloudHQ to implement auto labelling directly within your Gmail, enabling you to automatically filter emails from specific addresses and categorize them into your designated Gmail Labels.

4. Keep Revising Your Gmail Label System
Once you have created a Gmail label system, it is important to keep revising it. You should continually make alterations to the system to keep it up-to-date. Also, review your labels and make any necessary changes, such as deleting unused labels or adding new ones.
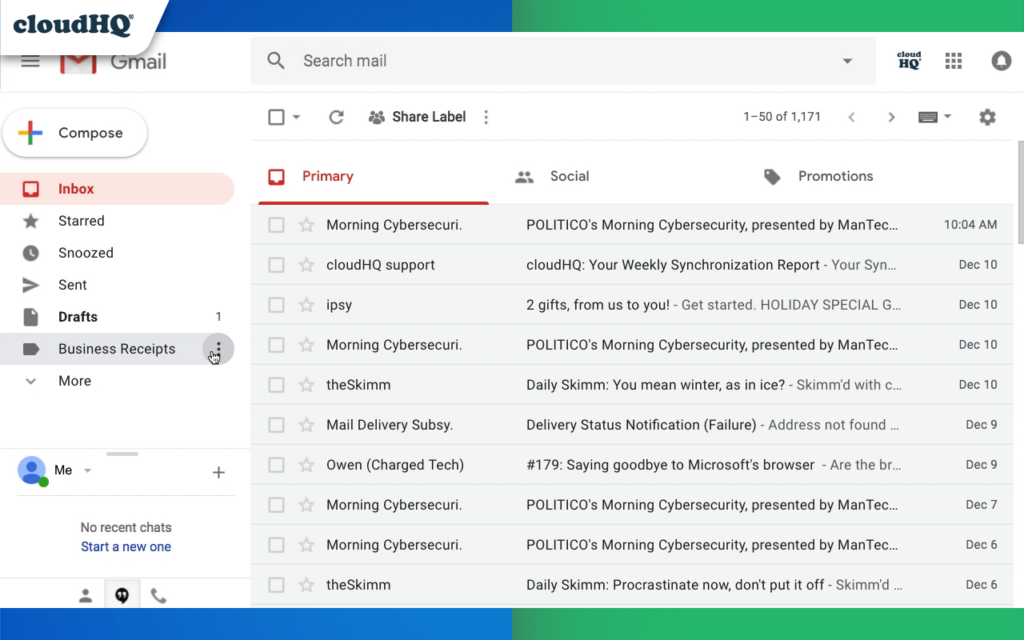
5. Share a Gmail Label
An efficient Gmail label system is crucial for reducing stress and enhancing productivity in both your personal and professional life. To take your organization to the next level, cloudHQ’s Gmail Label and Email Sharing app allows you to share a specific Gmail label with another individual.

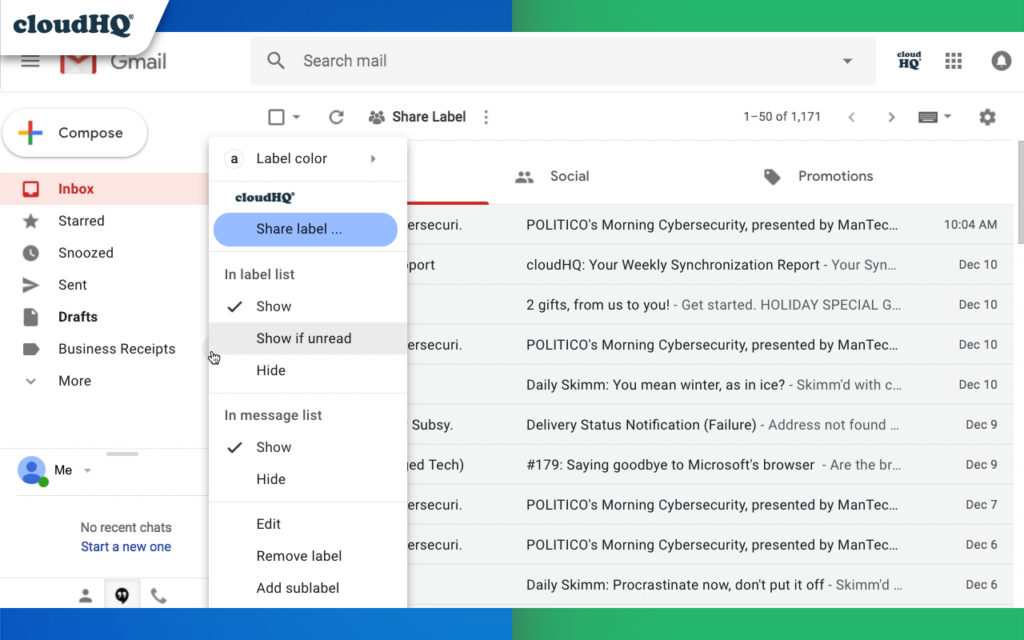
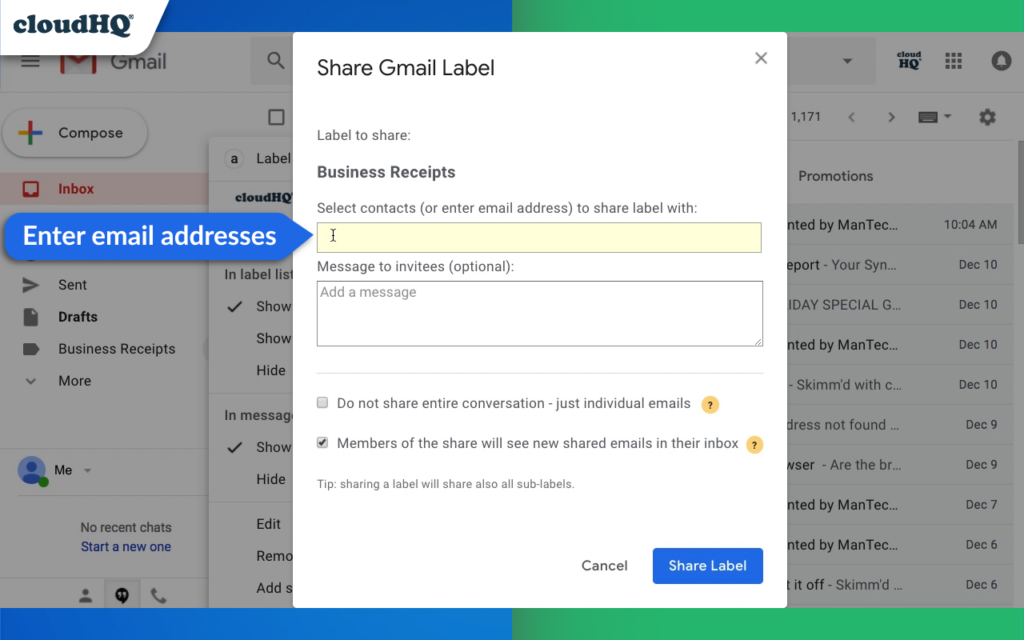
As Gmail does not inherently offer label sharing capabilities, this app simplifies the process of sharing entire labels with others. In turn, it promotes seamless collaboration on projects and saves valuable time.
In conclusion, effectively managing your Gmail inbox with a well-organized label system is essential for boosting productivity, reducing stress, and maintaining a clutter-free work environment. By following the steps outlined in this article, you can create a tailored and efficient Gmail label system that suits your specific needs. Don’t let an overflowing inbox hold you back; embrace Gmail’s labeling features to take control of your email and enhance your overall productivity today.