

A Zillow spreadsheet will help you track and compare new real estate listings in your area.
Zillow provides a tremendous amount of real estate information. But sometimes that information is difficult to keep track of, especially in a busy real estate market. That’s where a Zillow spreadsheet can help.
Whether you’re buying, selling, or working as a real estate professional, one way to organize all that data is by creating an always-updated spreadsheet full of the latest property listings.
All you need to set this up is a Zillow account, a Gmail account, and cloudHQ’s free Chrome extension: Export Emails to Excel, CSV, or Google Sheets.
Here’s how it works:

1. Install the Chrome Extension
First, you’ll need to install the Export Emails to Excel, CSV, or Google Sheets Chrome extension from the Chrome Web store.
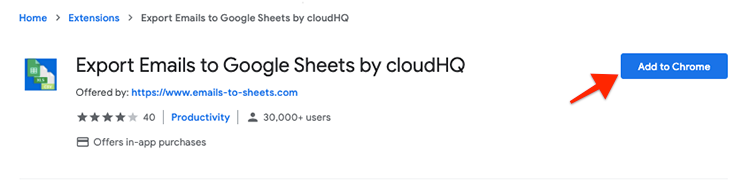

The extension is free to use for anyone with a Gmail account or a work email hosted with Google Workspace.
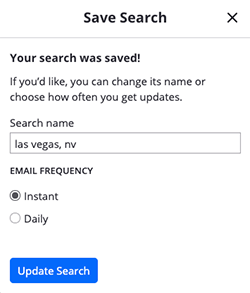
2. Create Email Notifications Using Zillow
In Zillow, set up notifications for new listings by saving a search, then choosing how often you want to receive emails.


Once you have a search saved in Zillow, you’ll receive emails daily or each time there’s a new listing, depending on your settings.

3. Export Zillow Data from Gmail to Google Sheets
Next we’ll create a system in Gmail to capture each new Zillow notification, then export it to a Google sheet.
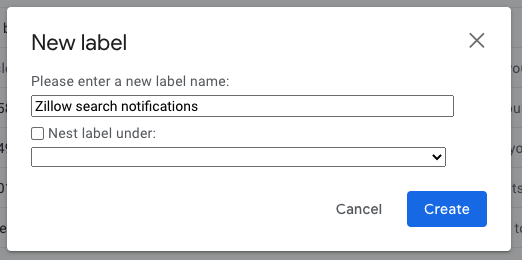
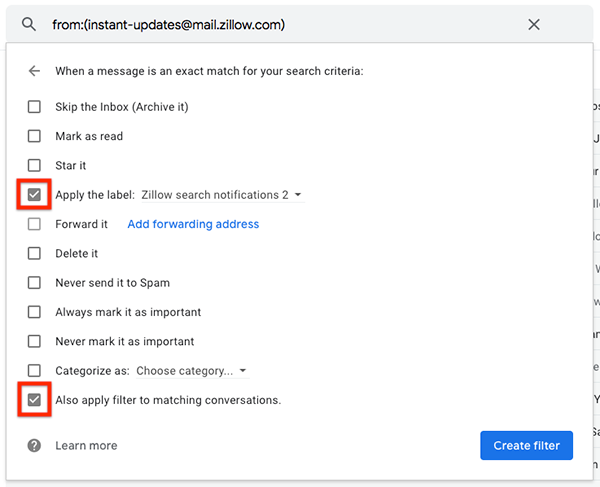
Create a Gmail label for Zillow
In Gmail, create a label to organize your Zillow notifications. In this example, we’ve created one called “real estate listings.”

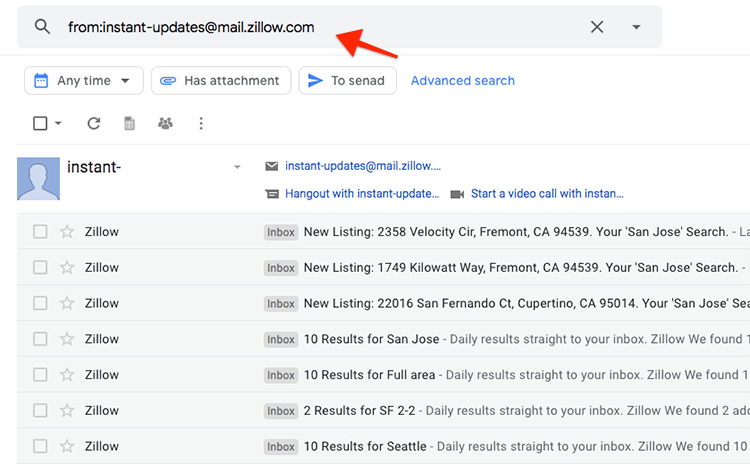
Search your inbox for Zillow emails
Next, search your inbox for all the email you’ve received from Zillow about new listings.
In our example, we’re receiving emails from instant-updates@mail.zillow.com.

Create a filter to add your label to all Zillow notifications
From the search results, click the drop-down arrow to see your search options.
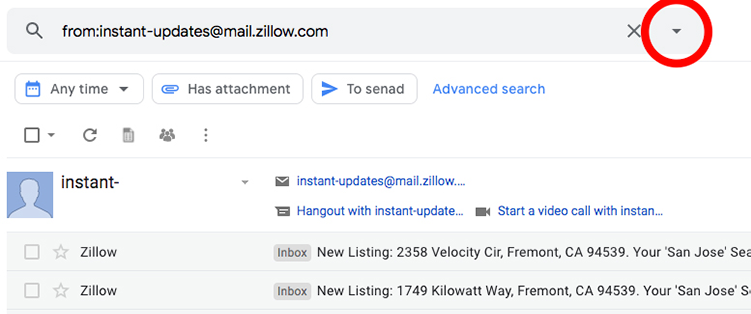

Then choose “Create filter”:
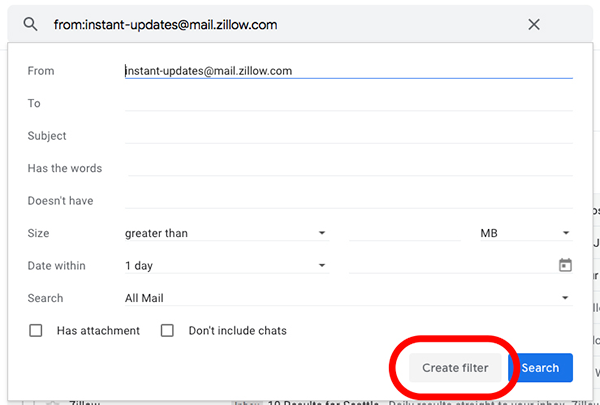

Then check the box apply your filter to new emails from this sender.
To apply the filter to all current emails in your inbox, check the box to “apply this filter to matching conversations.”
Then click the ‘Create filter’ button.

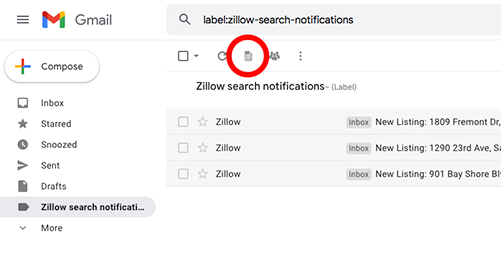
4. Export Your Label to a Google Sheet
With your filter and label in place, you can now create the spreadsheet to hold all your Zillow notifications.
To do this, click the newly added export icon in your Gmail account:

Doing so will redirect you to the cloudHQ dashboard where you’ll have a variety of email parser wizards to choose from:
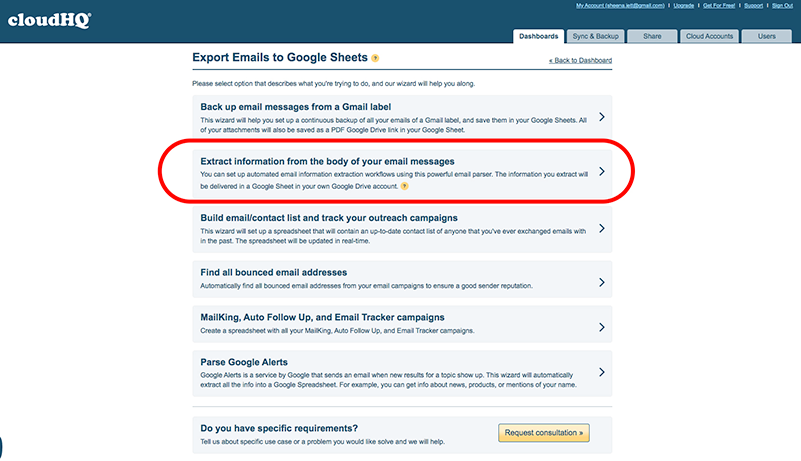

Follow the wizard prompts to choose the data you’d like to export about each property.
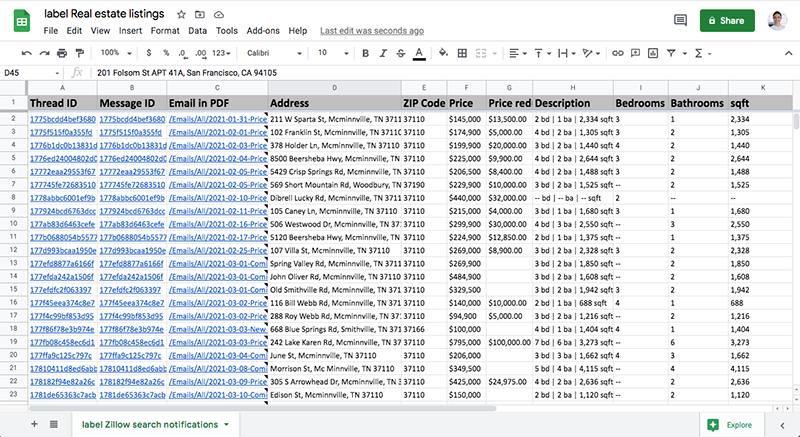
cloudHQ’s artificial intelligence engine will suggest fields to for your Zillow data, including:
- Address
- Zipcode
- Price
- Price reduction
- Description
- Bedrooms
- Bathrooms
- Square footage
You will have the option to add or customize other fields you want to export as you walk through the steps of the export wizard.
When you’re done, click “Start export.”
Your email data will begin exporting in the background. Depending on the amount of information you’re exporting, it may take a few minutes to fully parse and export your data.
When the export is complete, we’ll send you an email to let you know.
5. Your Zillow Spreadsheet Will Update Automatically
From this point forward, every time you get a Zillow notification about a property listing, your Zillow spreadsheet will automatically update to include the new information.

This way you’ll have all the data you need to find your dream home — without having to flip through dozens of Zillow emails every day to monitor new listings.
Use Your Zillow Spreadsheet to Compare New Listings
Your Zillow spreadsheet will give you the information you need to compare new listings, schedule tours of homes that interest you, and keep track of what’s happening in your area.
You can download our free Chrome tool and get started on your Zillow spreadsheet in under a minute.
Try it for yourself!
![]()
