

The average office worker sends around 40 emails a day, and receives upwards of 120 emails. That’s a lot of emails—and a lot of time spent having to filter and answer each of them.
No matter how fine-tuned your email filtration system is, you’re bound to end up typing a lot of the same sentences, over and over.
With Gmail Snippets, cloudHQ’s latest (and free) Google Chrome extension, you can create keyboard shortcuts for those sentences that you write so regularly in email. It’ll save you a lot of time and effort, all without having to worry about typos or improper email formatting.
Here’s a 1-minute movie that’ll explain how it works: video
How to Install Gmail Snippets
Go to the Google Chrome Store, and click on the “+Add to Chrome” button in the top right-hand corner.

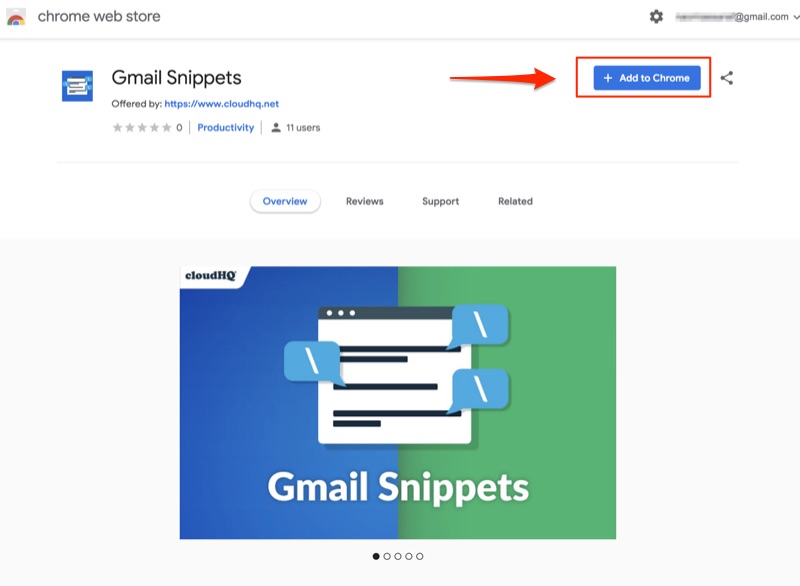
When the “Add Extension” window pops up, just click on it to install the Gmail Snippets extension.
How Do Gmail Snippets Work?
If you’re an iPhone user, you’ve probably already used the infamous “omw” acronym in your text messages, only to have your iPhone automatically expand your acronym to “On My Way!“
Gmail Snippets is very similar in concept, with 3 main differences:
- This is exclusively offered to Gmail users who use a Chrome browser
- You must activate your snippet by writing “\” + the snippet shortcut command in your email
- It’s easy to create your own customized snippets
Snippet shortcuts create reusable blocks of text that can be used whenever you write an email. Because every snippet shortcut is paired up with a unique block of text, you’ll only need to write a snippet shortcut instead of writing the same block of text over and over in each of your emails.

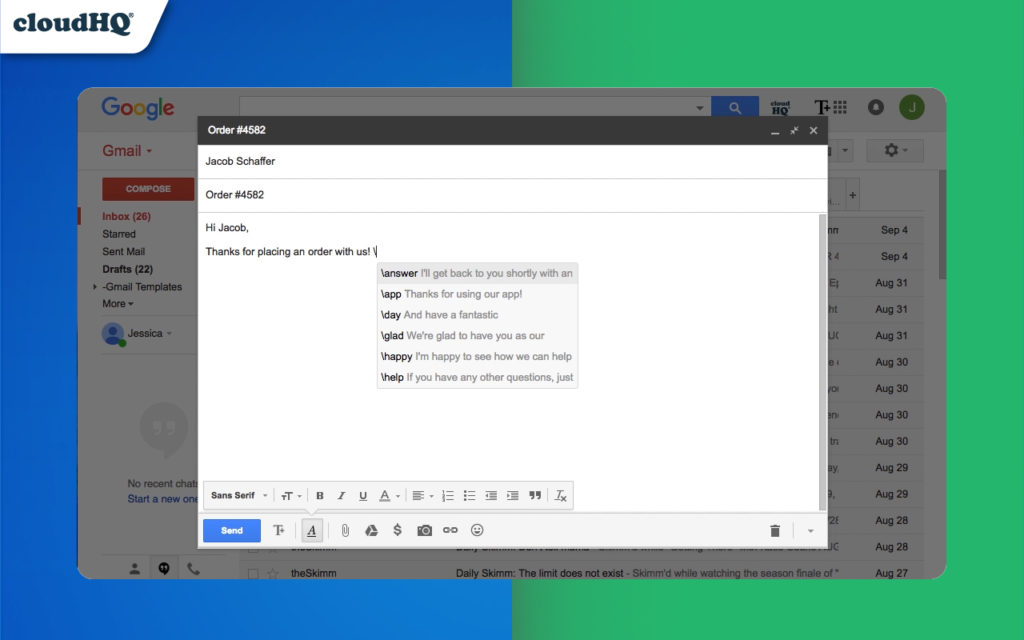
In this example, writing “\answer” in the body of your compose message window will trigger a block of text that reads: “I’ll get back to you shortly with an answer.”
Or, if you write “\help“, you’ll get a block of text that reads: “If you have any other questions, just let me know and I’ll be happy to help.”
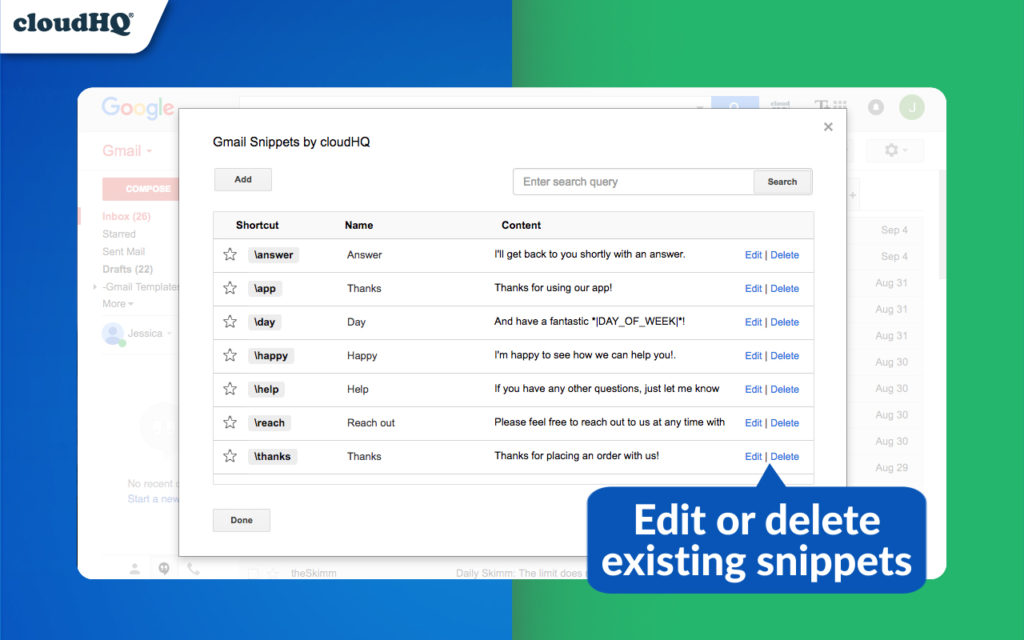
You can also edit any pre-programmed snippets in case you want to alter the text content to represent a different tone of voice, or even completely different text content altogether. Besides that, you can even delete any of your snippets from your snippet menu, too.
How to Create New Snippets
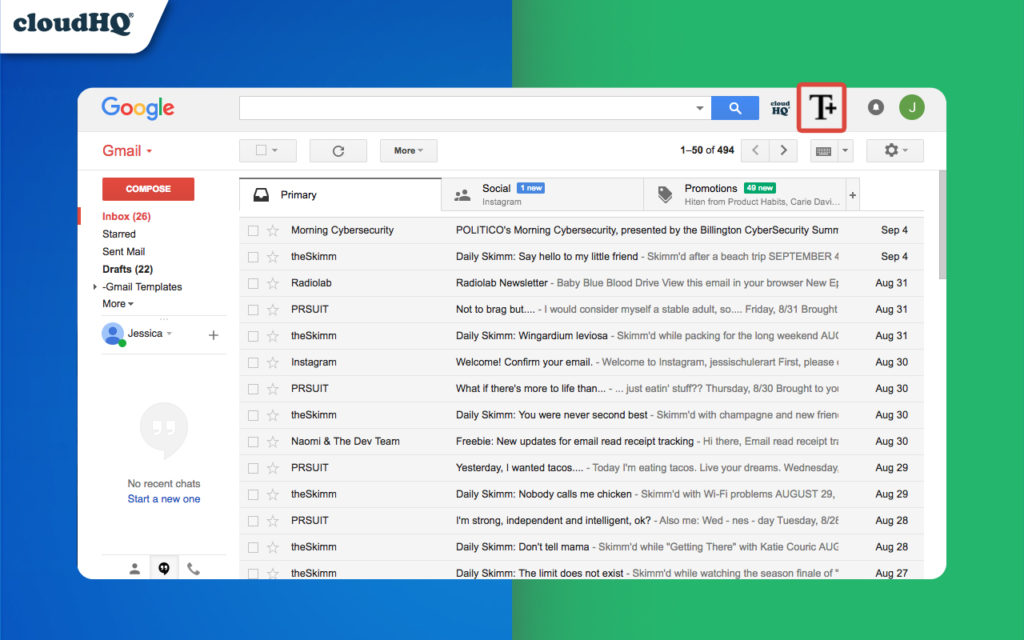
To create new snippet shortcuts, simply click on the snippets icon that appears on the top right of your Gmail’s inbox:
You’ll see your snippet menu pop up on your screen. Just click on the “Add” button that you can find on the top left corner of your popup, and you’ll be on your way to creating your very own new snippet.
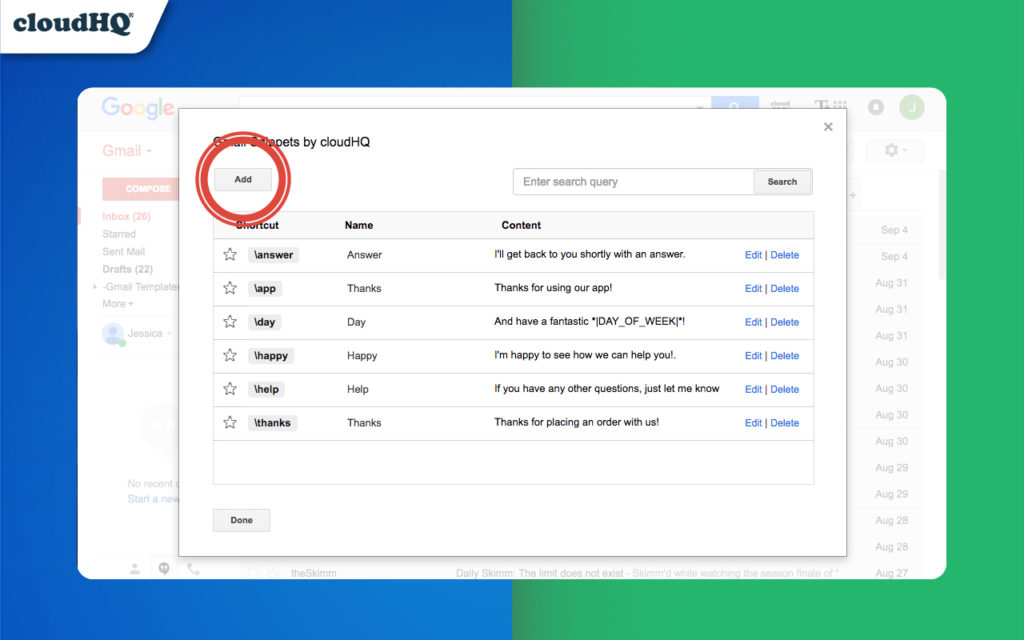
Once you click on the “Add” button, you’ll notice a form that asks you to fill out 3 specific fields:
- The snippet shortcut that you want to use when you write your emails
- The name of your new snippet
- The text content that you want to pair with your new snippet shortcut
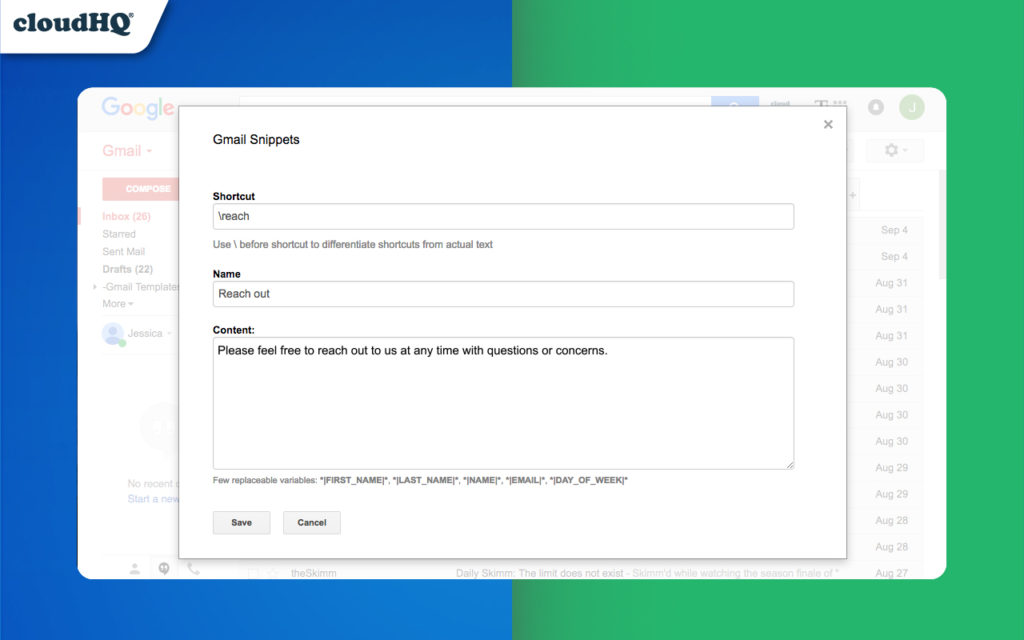
Just click on “Save” when you’re done, and you’ll see that your new snippet shortcut now appears in your snippet menu.
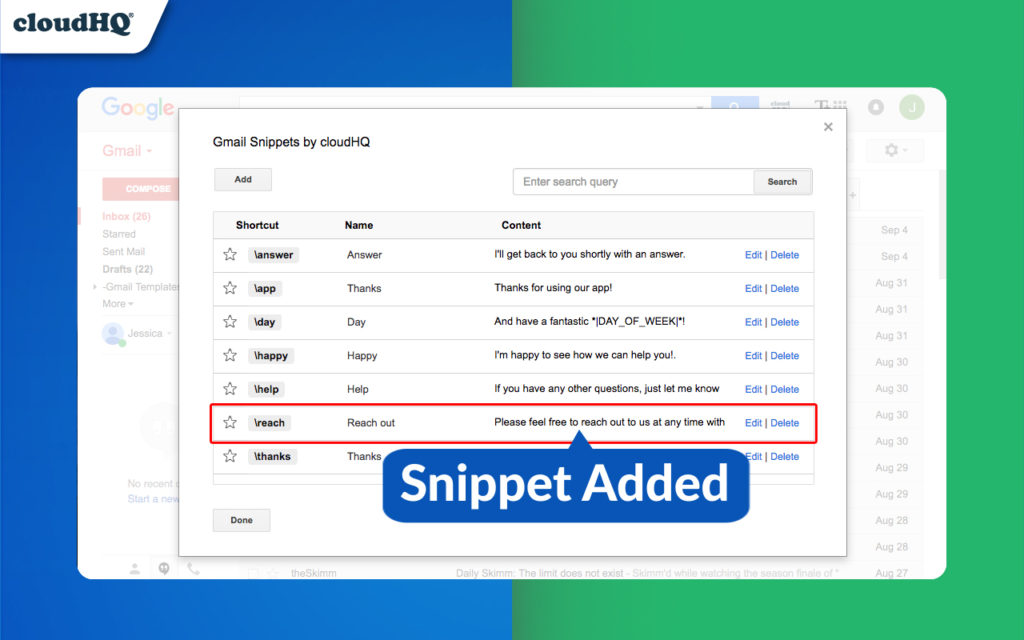
You can create an unlimited amount of snippets, and are only limited by your memory!
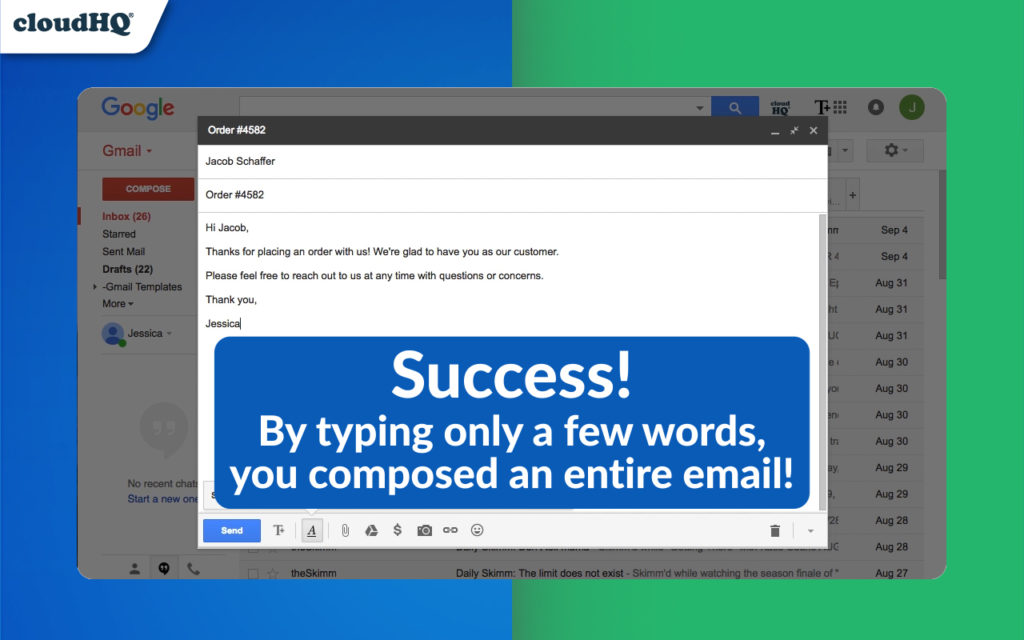
When you write your snippet shortcut in your email, it’ll automatically expand to match the text content that you created for it.
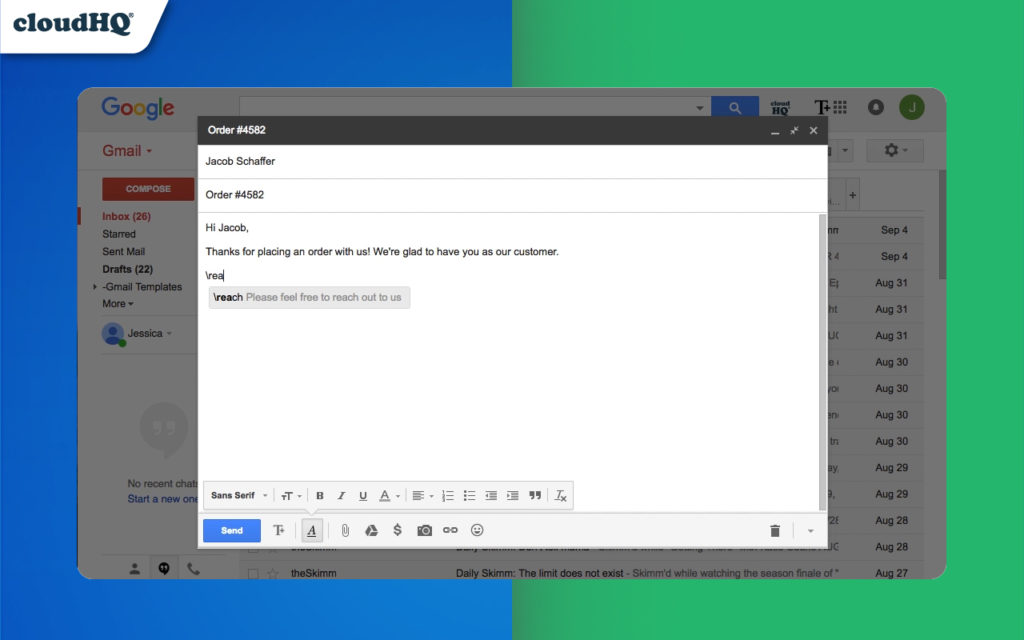
In this example, “\reach” automatically reads as: “Please feel free to reach out to us at any time with questions or concerns.”
Common snippets include:
- Introductions
- Thank-you messages
- Signatures
- Product pitches
- Answers to frequent questions
Who Uses Gmail Snippets?
- Salespeople
- Customer service representatives
- Lawyers
- Realtors
- Venture capitalists
- Anyone who sends email on a regular basis, and wants to save time
Click the button below, and start saving more of your time today.