

Personal data has become a hot topic of debate in recent years. Cambridge Analytica, Equifax, and the Yahoo! data breach all have people worried about their online security.
Recently, Yahoo’s parent company Oath updated its privacy policy. That may not seem like anything to be alarmed about – but the fine print tells another story. An article on CNET points out that the new privacy policy gives Oath the ability to scan user emails for the purpose of targeted advertising.
If you’re like most people, you’re already using a different email service like Gmail or Outlook. But whatever happened to your old Yahoo account? Did you:
- Stop using it?
- Only delete the data-sensitive emails like ones with your:
- credit card information,
- tax returns, or
- social security number?
- Delete it entirely?
If your answer is anything other than deleting your Yahoo! email account entirely, then you’re at a bright red, high risk for data breach security, and you need to act quickly.
Maybe Oath is a great company with strong data security, but “trusting” them is a tough pill to swallow– especially given that Yahoo mail has had repeated data breaches in the past, and is now forthcoming about how they plan to use your data in the future.
Luckily, there’s an easy way to migrate your email from Yahoo, and then delete your old Yahoo account.
How to Migrate from Yahoo Email
Step 1. Visit cloudHQ
Visit cloudHQ, and sign in if you’re not already signed in automatically.
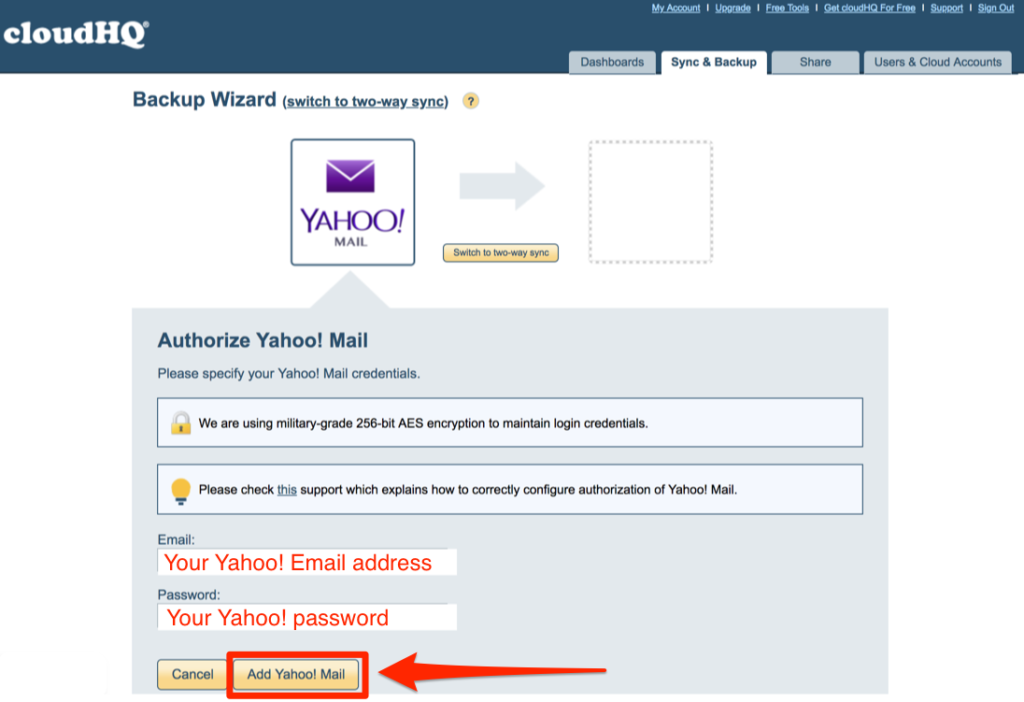
Once signed in, you’ll be prompted to give an authorization to cloudHQ so that we can begin the process of moving your emails out of Yahoo! email. All you need to do is:
- Enter your Yahoo! email address,
- Enter your Yahoo! password, and
- Then click on the “Add Yahoo Mail” button

Step 2. Select a Yahoo! Email Migration
Make sure that you select the second box that will simply copy your emails over to another service, like this:

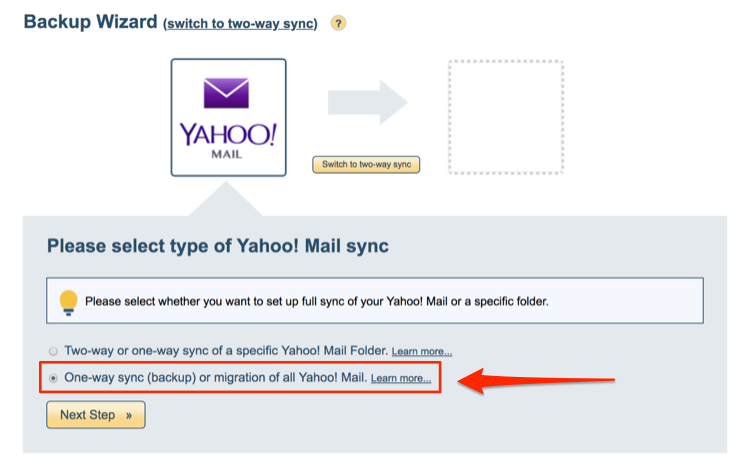
When you selected the migration option, click on “Next Step”.
Step 3. Get a New Email Account
Open a new tab, and navigate to Outlook or to Gmail and create a new email account. This is where you’re going to be sending all your old Yahoo emails to, before you delete your Yahoo email once and for all.
For this example, I created a new Gmail email address because
- It’s free, and
- It’ll keep the same email filing system folder structure that I had back when I was using Yahoo; which is very handy.
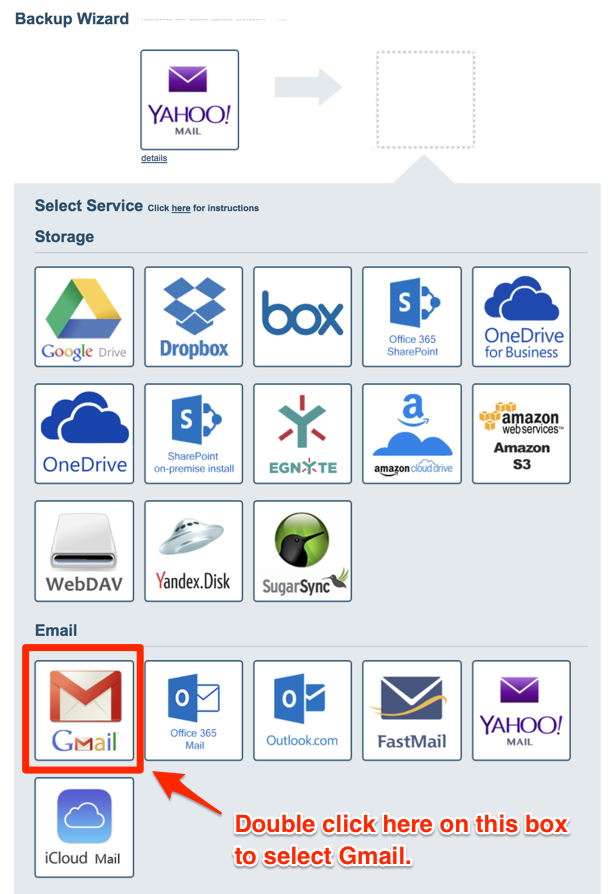
Step 4. Choose Where You Want To Save Your Yahoo Emails
Go back to the cloudHQ tab. The wizard will now prompt you to choose where you want to save your Yahoo emails.
Wherever you created your new email account, now’s the time to select that service. For this example, I’m going to choose to migrate my Yahoo Mail to the new Gmail account that I just created.

It should now look like this:

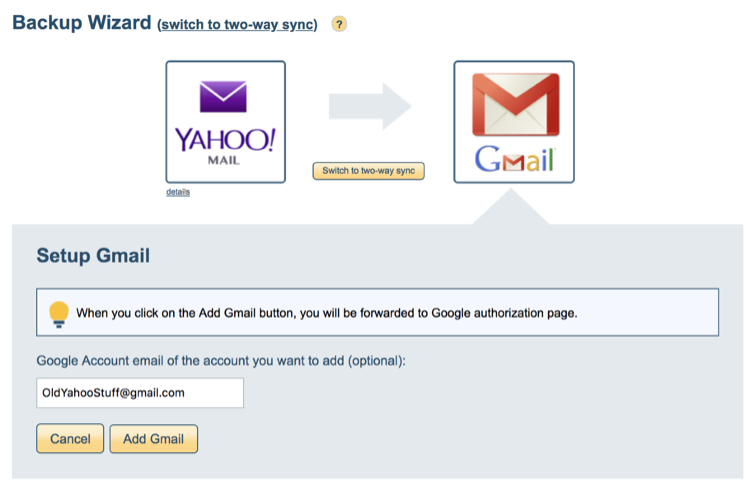
Once done, click on the “Add Gmail” button. Gmail (or Outlook if that’s what you chose) will authenticate your identity by prompting you to enter your password, and to give cloudHQ the necessary permissions to be able to copy all your Yahoo emails over.
It should also be noted that cloudHQ proudly uses 256-bit AES encryption, and doesn’t store any of your data once the migration is complete.
Step 4. Start Your Yahoo Mail Migration
When your authentication is complete, you’ll return back to the cloudHQ wizard. Just click on “Start Sync” to get the migration started.

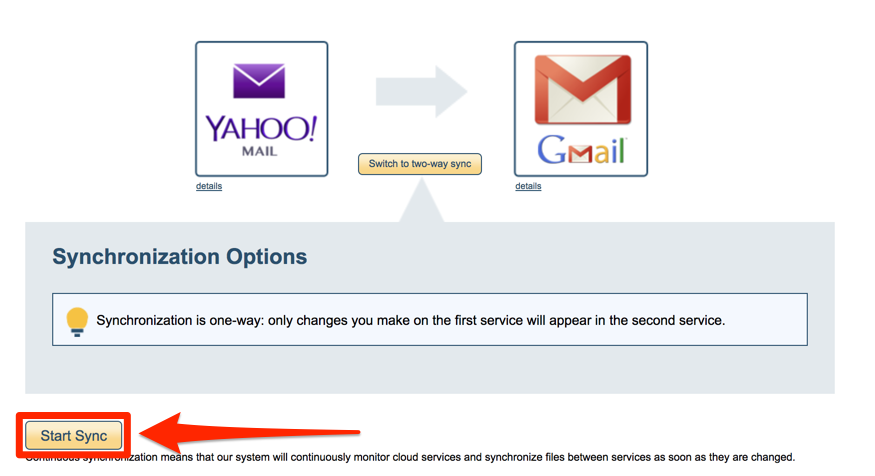
Once you start your sync, your job is done, and we’ll take care of the migration.
Step 5. Wait Before Parting Ways With Yahoo
When your data has been synchronized to your new Gmail (or Outlook) account, you’ll get an email from our support team with the subject title: “Success! Your initial transfer is complete!”. It should look like this:
![]()

If you didn’t yet receive that email, you’ll need to wait until you do before you can delete your Yahoo email account. Please note that the faster you start this process, the better. Yahoo is currently limiting data transfers to about 6000 emails/day, so depending how many emails you have in your Yahoo account, you could be waiting for some time before your initial data transfer is complete.
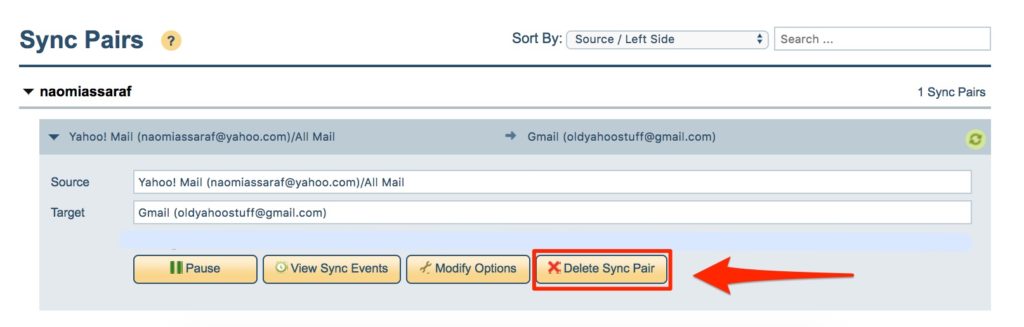
Step 6. Stop the Data Transfer
Once you received your email from cloudHQ, log into your account, and go to the “Sync & Backup” tab. From there, scroll down to the “SyncPair” section, and you’ll see your running migration. Delete that sync pair.

Step 7. Time to Delete Your Yahoo Account Forever
It’s that time where we say goodbye to an era of Yahoo’s email reign. Sign in to the Yahoo account termination page, confirm your identity, and delete your Yahoo account once and for all.
Yahoo will continue storing your data for 40 days in the United States, and up to 180 days in Brazil. If you sign back into your Yahoo account, you’ll need to restart the deletion process, so don’t sign back in.
Once you’re done with Yahoo’s waiting period, you’ll be free and clear of that particular service, and you can rest easy that your data will now be more secure in Gmail or Outlook.