


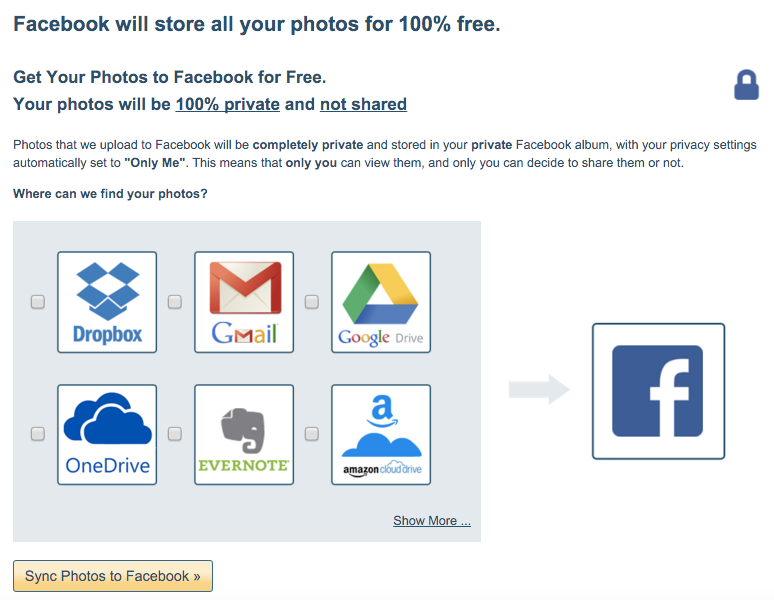
With last week’s announcement, you’ve probably already tried our free “Get All Your Photos In Facebook” service. If you haven’t, cloudHQ will make a free copy of all your photos in your private album, in your Facebook account. You can choose to get those photos from any service you choose like: Dropbox, Google Drive, OneDrive, Evernote, and Gmail attachments.
Why did we choose Facebook? 2 simple, yet effective reasons:
- Facebook will let you upload an unlimited amount of photos for free, and never charge you for storage.
- Facebook provides you with a beautiful way to view your photos and to share them with one friend, a small group of friends, all your friends, all your friends and friends of friends, or publicly to anyone at all.
Once you enable the service, you’ll probably get hit with a walk down memory lane. Here’s how you can share your memories from your Facebook private album with whomever you like.
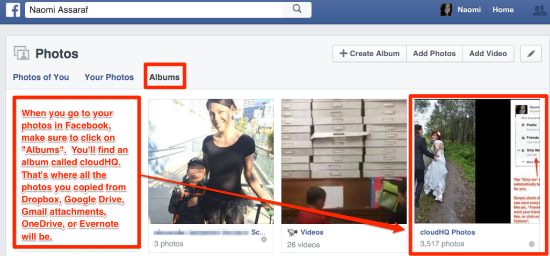
Step 1. Find Your Copied Photos
-
Log into your Facebook account and look at your photos.
-
Make sure the photos you’re looking at are under “Albums”.
-
Find the album that says “cloudHQ Photos” and click on it.
Step 2. Find Your Photo Settings
-
Click on any of your photos.
-
Find the little lock icon next to the date of your photo on the right hand side and click on it.
-
A drop down menu will show up where you will see the “Only Me” option is pre-checked for you. This means that only you will see this photo.
- This can be changed if you would like to share this photo.

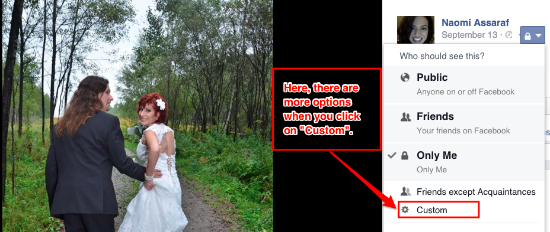
Step 3. Know Your Sharing Settings
-
If you click on “Public”, you will publish this picture with anyone on or off of Facebook.
-
If you click on “Friends”, only your friends on Facebook will see your published photo.
-
If you click on “More options”, you will see a secondary dropdown menu with a “custom” option.
The “Custom” feature is voted as the very best option by everyone in our office. Read on to understand more about it.
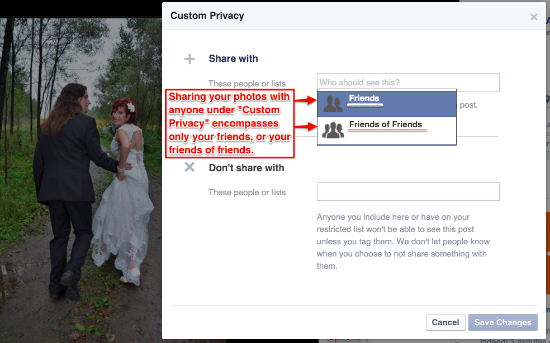
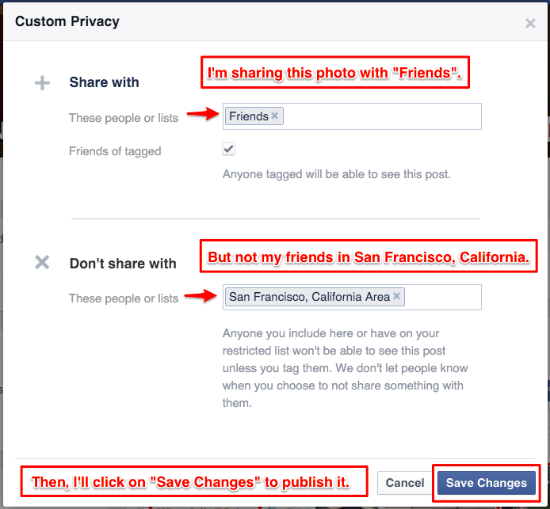
Step 4. Your Custom Menu
In your “Custom” option, you can either share your photo with, or not share with people and lists.
Before we get into that, it’s important to understand the subset of your photo sharing population: You can only share your photo with either “your friends” or “your friends of friends”.
Sharing your photo in the “Custom Privacy” option will never be made available to the public at large, but can be made public to your friends or your friends of friends; depending what you choose. If you don’t want to share with so many of your friends, and maybe you only want to share your photo with one person, read on — this next one is for you!
Step 4. (More About) Your Custom Menu
If you don’t want to share with all of your friends, Facebook has an option for you: just share it with specific people. Only the people you physically list in the “Share with” box, will be able to see your picture. As you can see, I chose to share with Senad.

Step 4. Your Custom Menu (Still Covering This Section)
If you choose “Friends” or “Friends of friends” in the top half of this section, and define who not to share with in the “Don’t Share With” section, everyone you chose EXCEPT those people you defined, can see your picture. You can also include lists instead of, or in addition to, specific people’s names; like the people who work with you at your “company name”, your “Family”, or a “city location”. See my example below.
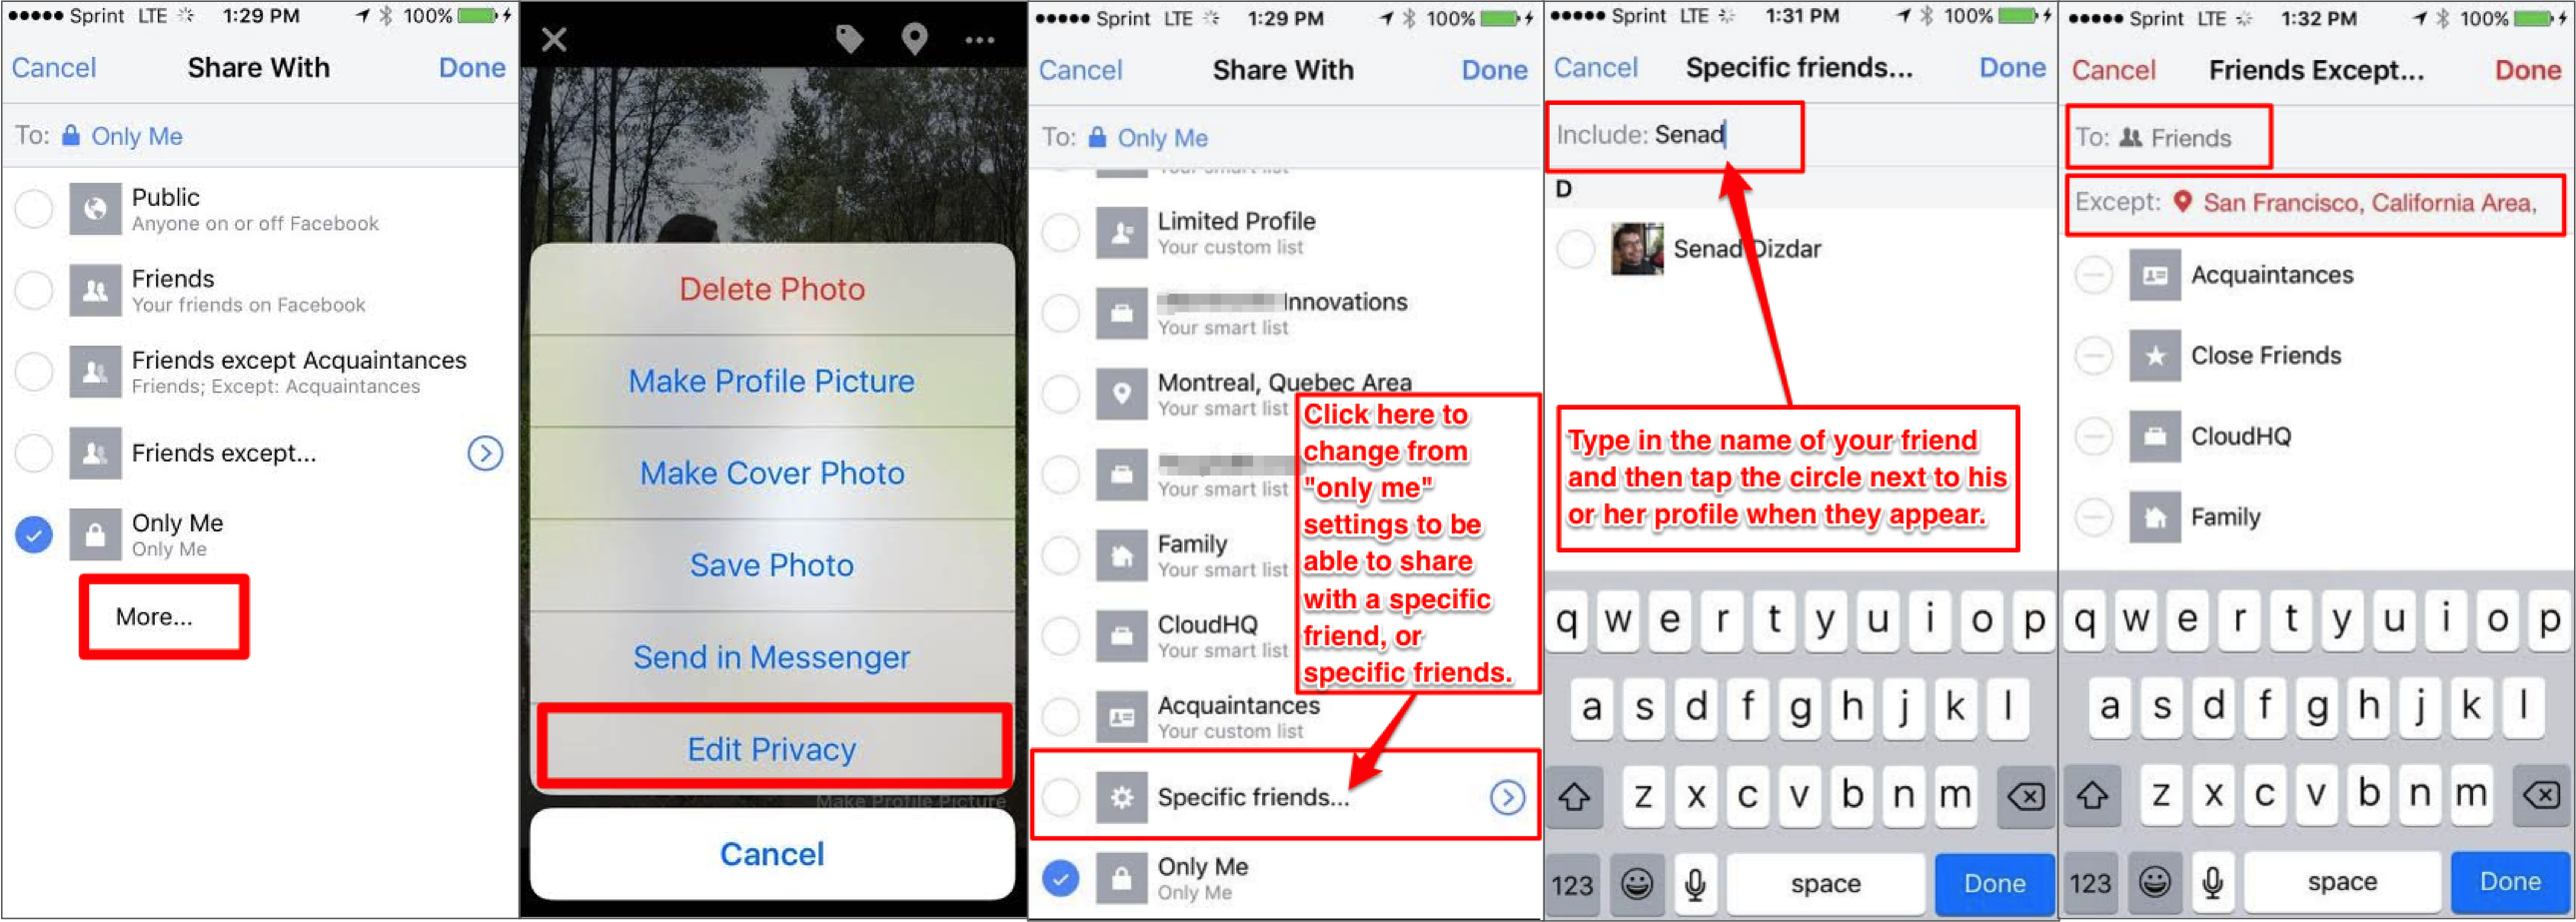
Facebook doesn’t look the same on mobile as it does on desktop. All of the above steps are described in mobile snapshots below to help you sort through any user interface changes:
Step 5. Know Your Headquarters. Your cloudHQ.
cloudHQ is so much more than just a free photo copying solution to Facebook so that you can have unlimited photo storage and easier photo sharing. It also has:
-
Free Gmail Label Sharing.
Do you have a bunch of emails that need to get forwarded to one person or to many people? Just put them all in your Gmail label on the left, and share that label out with anyone who has an email address. It’s simple, free, and great for keeping teams on the same page. Get it here. -
Easy Teamwork For Freelancers.
Here’s where we get a little techie, but it’s kinda cool… or at least our clients think so. You can sync virtually any app together using cloudHQ for amazing teamwork results. Synchronizing apps is necessary for any remote worker who uses many apps, and who needs to communicate with the rest of their team.For example, if a remote worker needs to use GoogleDrive, but his client only uses MS Office365, the remote worker can sync them all together, by folder! This way, the remote worker can see what his team is doing in MS Office365, and his team can see what he is doing in GoogleDrive, all in real-time, regardless of which apps are being used! Try it here for a free trial and see the app selection below:

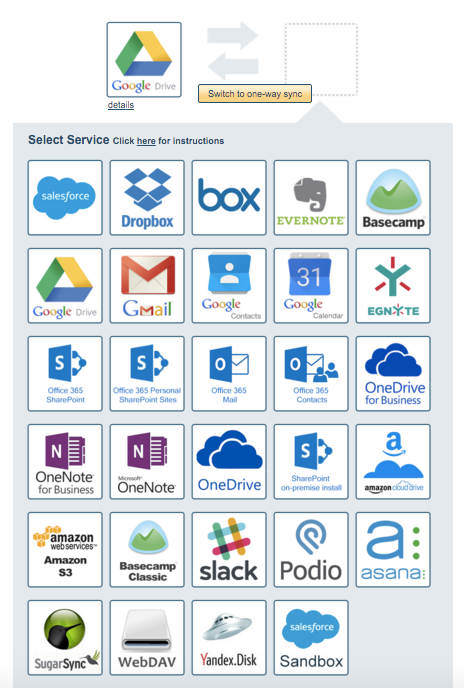
Photo used under Creative Commons from KJGarbutt