

Upload images from your computer and add notes on them using Gmail Screenshot.
You don’t need expensive photo editing software or image markup tools to upload, edit, resize, or add notes on screenshot images.
We just released a new update to Gmail Screenshot — our Chrome-based image markup tool that makes it easy to take screenshots, edit, resize, and share images using Chrome.
It’s yet another way to help you get things done — faster and with less time switching between applications.
Now, we’ve added the option to upload, edit, and resize any screenshot directly from your hard drive — no software needed.

![]()

Here’s how it works:
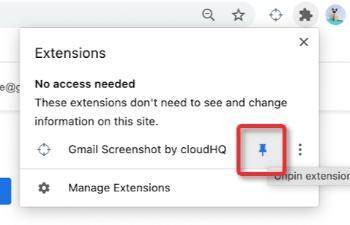
Step 1: Add the Gmail Screenshot Chrome Extension


First you’ll need to add the Gmail Screenshot by cloudHQ Chrome extension and pin it to your toolbar.

Gmail Screenshot is a free, lightweight Chrome extension you can install in one click from the Chrome web store.
After you’ve installed Gmail Screenshot and confirmed your account, pin it by clicking the puzzle icon and adding it to your toolbar.
This will give you one-click access to edit and resize images from anywhere in Chrome.
Step 2: Take a Screenshot or Upload an Image from Your Hard Drive
Click the icon in your toolbar and select whether you want to take a new screenshot or upload an existing image from your computer.
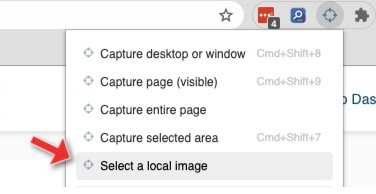

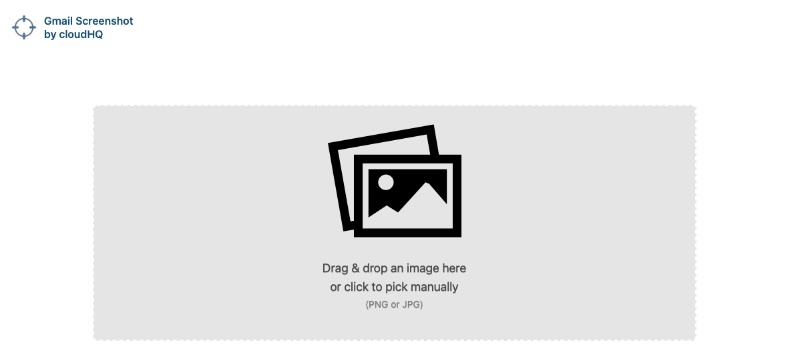
If you choose to upload an existing photo, you’ll see a simple screen where you can drag and drop your image for editing.

Step 3: Edit, Resize, and Add Notes to Screenshot Images
Once you’ve uploaded your image, you can edit, annotate, or resize it using a variety of tools in the upper toolbar.
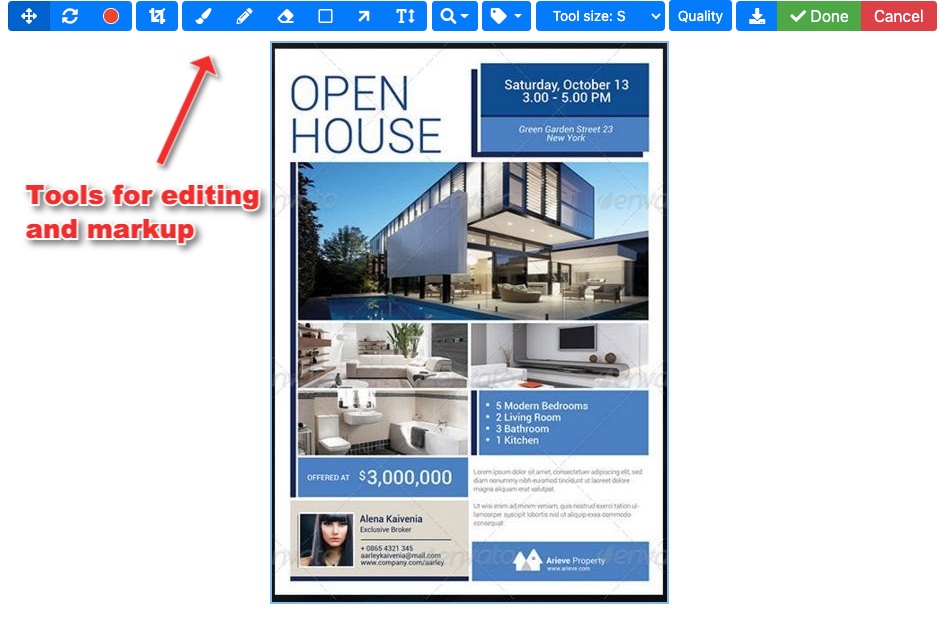

You can:
- Add text
- Use the brush, pen, or box tools to highlight areas of the image
- Add arrows to draw attention
- Pixelate areas to hide private information
- Add tags to make it easy to find later
- Crop and resize.
When you’ve finished editing the image, click “Done” to save the image to your Gmail Screenshot library.
Step 4: Save, Download, or Share Your Image


After you edit and resize images online, you’ll have three options:
- Copy a link to the image to your clipboard
- Save the image to Google Drive, Dropbox, Box, OneDrive, or Box
- Download to your hard drive.
Each option is as simple as clicking the button.
Even if you don’t choose any of these options, your edited image will automatically be saved in your Gmail Screenshot dashboard, where you can access or download it at any point in the future.
Upload, Edit, Resize, and Add Notes on Screenshot Images in Just Seconds
Gmail Screenshot makes editing and resizing online images online easy! Whether you’re sending an image to your graphic designer or resizing a photo for a follow-up campaign, it will help you process your images faster — without cluttering your desktop or your hard drive.
Gmail Screenshot is free to install for anyone with a Gmail or work email hosted by G Suite.
Try it for yourself today!
![]()