When it comes to project management, Basecamp is the ultimate tool. When it comes to cloud storage and file-sharing, Dropbox leads the way. Separately, each of these programs perform important and useful functions for their users. Together, they comprise the ultimate web design project management solution.
Why use Basecamp and Dropbox for web design project management?
Both programs are high-quality and cost effective, and each provides a service that makes the work life easier for many users. Basecamp benefits an entire team of people working on a single project as it takes all of their work and communication and organizes it into a single page. This way, all workers that login to the project will see the same page which will be comprised of the team’s tasks, documents, files, communication and more. Anything the team members add will be registered to that page.
While Basecamp is perfect for project management it is not so great at file management. This is where Dropbox enters the picture as it boasts the best cloud sharing around. When you are dealing with web design projects, the digital assets can be very large. Most cloud services have file size limits, but with Dropbox, there are no file size limits. This allows the user instant access to files and files/documents can be edited and revised directly in Dropbox instead of a constant upload/download of files if something needs to be changed. Dropbox also has excellent versioning control- if something is changed or accidentally overwritten, it can be restored up to 30 days later. If you think you may need versioning control that can restore files later than 30 days, Dropbox offers an optional feature called Packrat, which allows users to restore files for as long as they have the service.
Since these programs don’t offer sync options between each other, you will need to use cloudHQ to sync the files from Basecamp to Dropbox and vice-versa. CloudHQ offers a continuous replication of files so anytime a file is added or revised in Basecamp, the file is automatically and instantly updated in Dropbox. Users can select specific files or folders to sync or they can have cloudHQ replicate all files.
How to use Basecamp and Dropbox for web design project management?
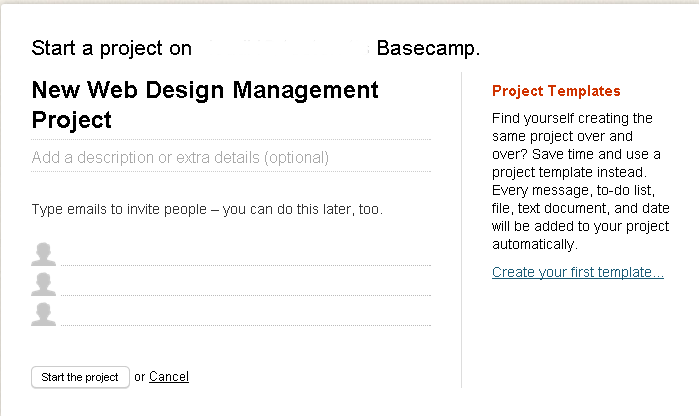
First step: create a project and invite people
From the Basecamp Dashboard, click on “Add Project.” Here you can name the project, add a description and invite other users to participate.

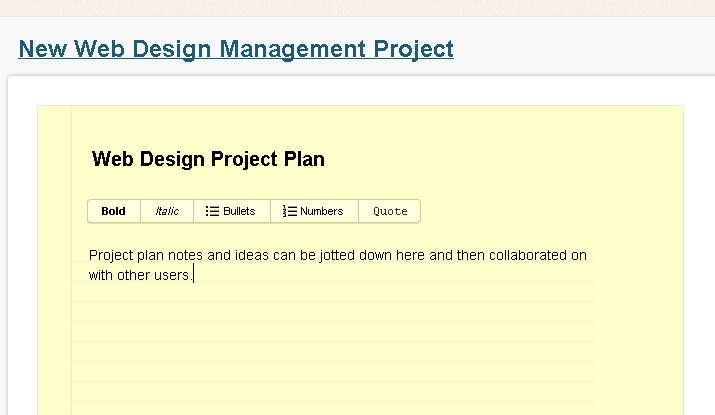
Use Basecamp Text Documents to draft project
Now, you need to utilize the excellent word processing features of Basecamp Text Documents to draft a project plan. It’s a simple but useful tool that allows user to edit drafts online and tracks changes to these documents. Anything that is typed automatically saves and shows up on other project user’s screens instantly. This allows users to collaborate on the project plan draft. If any accidents happen and text is overwritten or deleted, it features a restore function to any of the earlier saves.

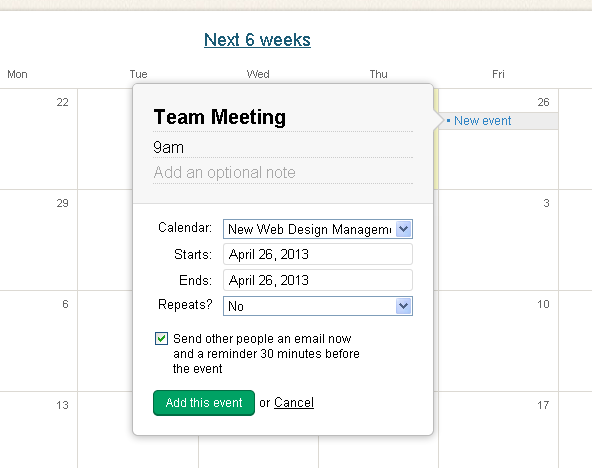
Use Basecamp To Schedule Meetings, Events, Milestones, etc.
The next step is to schedule a team meeting to get a more in-depth analysis of your project plan. This can be accomplished with Basecamp Calendar. Calendar is one of the most impressive calendar features of any program I have ever seen. You can add events and share them with everyone or only a select group of users. Color codes can be used to organize permissions. Users can collaborate on events using the “Discussions” feature so everyone can voice concerns, comments and suggestions before the meeting actually takes place. Email reminders can be scheduled to ensure that team members do not forget the meeting.
You can schedule your team meeting by clicking on the “Calendar” in Basecamp Dashboard and then click on “Add a new event.” Give the event a name such as “Team Meeting,” set a time and add any optional instructions for users.

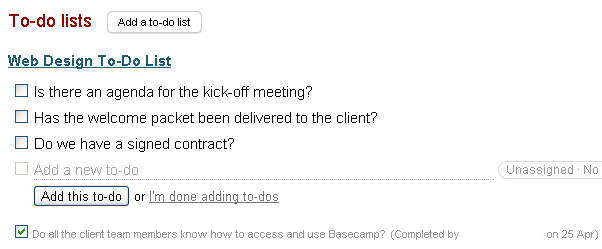
Create Todos
Now that the web design project is starting to take shape, you can assign specific tasks to individual team members by using Basecamp’s To-Do list feature. Each individual user has their own “Me” page that allows them to view any to-dos that were assigned to them, any conversations they have participated in and any files that they have uploaded. Each morning, each user will get an email that informs them what to-dos have been completed and what to-dos still need to finished. The to-do list has boxes that can be checked when the task has been completed. The task will drop to the bottom of the list but it will be greyed out and will be noted that it has been completed along with the date of completion.

Invite Clients and Collaborators
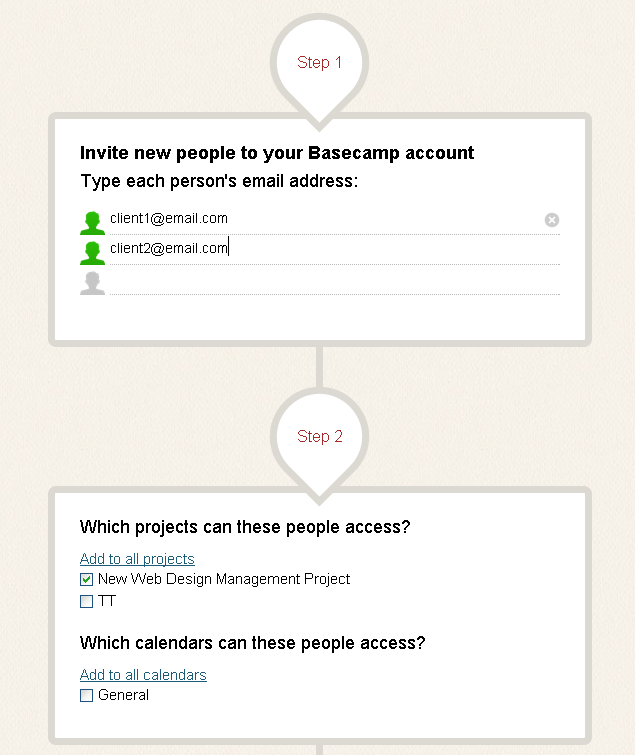
Provide your clients their own Basecamp login credentials so they can join in. Ask that they use Basecamp’s messaging system for all communications. This allows the client to have a “hands-on” approach to the project and it also allows all messages to be logged in the event of a miscommunication between parties.
This is accomplished by clicking on the “Everyone” link in Basecamp dashboard and then clicking “Add people.” Here, you can add the email addresses of your clients and any other users that you wish to have join the project. You can choose which projects these users have access to. You can also give users administrator privileges and permission to create new projects.

Setup Dropbox for Digital Assets
For the digital assets, you need to use Dropbox. With Basecamp, you will have to manually add, upload and download all files and Dropbox provides a much easier drag-and-drop method for instant upload, download and sharing. Many of these files (Photoshop files, screenshots, video files, etc.) can be quite large and can easily reach hundreds of megabytes or more. Dropbox has no file size limit so files can simply be dragged and dropped into folders which will then be replicated to Basecamp using cloudHQ. It can also be shared with the client using Dropbox, this enables easier sharing than Basecamp offers.
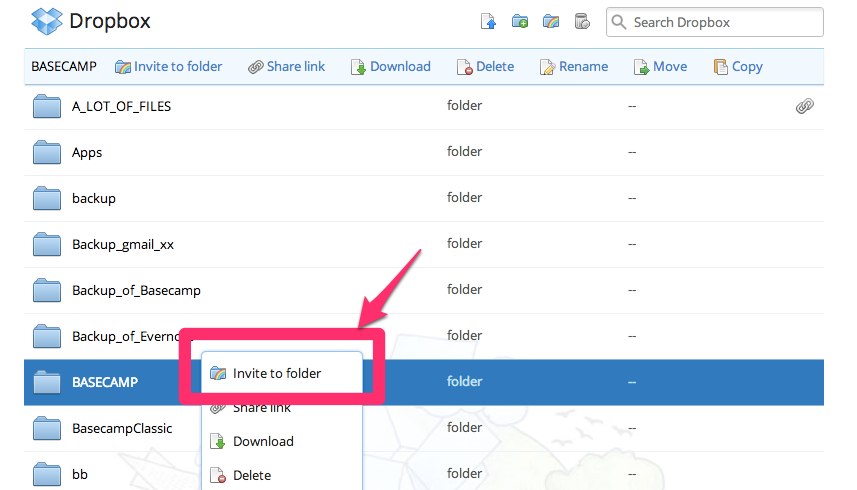
Basically, create a folder in Dropbox (called it Basecamp or Basecamp_files_in_Dropbox) – cloudHQ will create folder for each of each your projects inside that folder.
You can also share that folder with your team members via Dropbox:

Setup Sync Between Dropbox and Basecamp
Now set up your sync between Dropbox and Basecamp using cloudHQ so that all web design files will be replicated from Basecamp to Dropbox. The instructions on how to do this are here: Sync basecamp to Dropbox using cloudHQ.
Since you want to sync only don’t forget to tick “Sync only files” check box:


To enable cloudHQ to perform the automatic and continuous replication of data between Dropbox and Basecamp, click here for detailed instructions, and here are the easy instructions.
Once you have signed up at cloudhq.net, go to the “Synchronize’ tab. Click on “Add Synchronization Pair” and you will be taken to a page with a variety of cloud service icons to choose from and two boxes. Drag the Basecamp icon to the box on the left and follow the instructions to authorize Basecamp. Then drag Dropbox to the other box and follow the instructions to authorize Dropbox. Note- be sure to check the box that says “Sync only Basecamp files” to ensure that only files are replicated.
In case something happens and data loss were to occur, we recommend that you also create another sync pair to archive all files into another Dropbox folder (or maybe even other Dropbox account) purely for backup and archiving reasons. To accomplish this, create another sync pair from Basecamp to Dropbox but this time click the link titled “Switch to one-way sync” to create a one-way sync. This time do not check the box that says “Sync only Basecamp files” since you want a complete backup of everything.