


Then you, as a teacher, can hand out content to the students via a shared Evernote notebook. The students can work on their assignments using Evernote or collaborate via Google Docs.
Here is are the steps in details:
1. Preparation: create Evernote and Google Drive accounts and setup sync
Besides using Evernote, Google Drive is an excellent tool for students and the best part is that it can be used alongside of Evernote by using cloudHQ to sync the two cloud services together. Many schools use Google Apps because Google offers excellent discounts for schools and educational institutions.
a. Create accounts in Evernote and Google Drive:
So first create Evernote and Google Drive accounts for teachers and students. Teachers will need a premium Evernote account because they need to create shared notebooks.
b. Establish sync between Evernote Google Drive:
Then the teacher should establish a two-way sync of their Evernote account with a folder in Google Drive. This can be easily done via the cloudHQ sync wizard (steps can be found here:)
This will ensure that *all* changes in Evernote will be replicated in Google Drive and any files added to the Google Drive folder will also be added to Evernote.
Why sync Evernote and Google Drive? The first is reason is collaboration: Many assignments and projects require constant collaboration between students as they work together to achieve their goal, and Google Drive’s collaboration features are THE BEST in the world. CloudHQ will sync all Evernote notes with Google Drive. So if students need to collaborate on a document, they can share this document between them via Google Drive, open the document in Google Drive for editing, and cloudHQ will automatically sync the revised changes back to Evernote. The second reason is backup and archive: Backup of files is extremely important, especially in a shared environment. Notes can be accidentally deleted, updates and revisions might get lost, etc. Although Evernote does have a “revert from trash” feature, the Evernote revision control is really not as good as Google Drive so not all changes can be reverted. If data becomes lost or deleted, there is a much better chance it can be recovered through Google Drive. When cloudHQ is used to sync Evernote to Google Drive, this also creates a secure backup of all files.
c. Create notebooks:
Then, teachers need to create the notebooks for them and students:
- Teacher’s notebook: this notebook is shared with class students, but read-only access is granted so the students cannot edit or delete the files.
- Then create a notebook for each of the students: read and write access granted to students.
d. Share Google Drive folders with students:
Now, since cloudHQ will copy all notebooks from Evernote to Google Drive, also share the folders in Google Drive with students:
Share folder “Stacks and notebooks/Teacher’s notebook” as read-only with students. Then share each student’s notebook with the corresponding folder with read/write access.
2. Teacher -> Student
The first action is teacher to student. The teacher hands outcontent to the students in order to start the learning process. This material may consist of an outline, attached documents such as a PDF or DOC files, images, internet URLs, and music or video files. A combination consisting of some or all of these materials may be used by the students for efficient creating, communicating, and writing. The best part is that this material can be sent out anytime- it can be sent out to the students the day before, or even a week before if the teacher prefers a weekly plan. Or it can be sent out just as the students arrive to class or during class, depending on what the situation calls for.
This material is stored in an Evernote note which is shared with all students. Each student will have read-only access to the files so they can open and view documents, attachments and images, as well as being able to click on the links but they cannot edit any of these documents. Each student has their own workspace (notebook) where they can add and edit documents and files.
3. Student Work
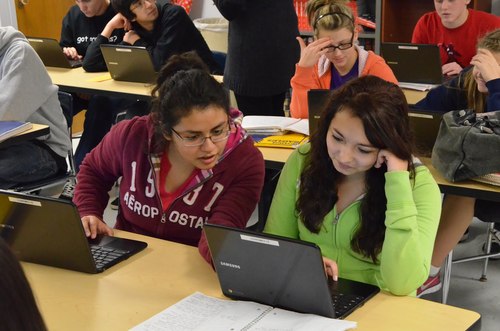
This step is the actual work that the students do with the aforementioned content- such as reading documents, watching video files, creating files, writing drafts and collaborating with other students in groups within the classroom. Students can use Evernote and if online collaboration is needed, then Google Drive is the tool of choice. A great classroom tool at this point is the iPad (or some other tablet). For the amount of work that is done in the classroom, the tablet itself should be sufficient, although for speed and efficiency, students need to have a keyboard. The best way to achieve this is to use either a wireless or a USB keyboard that connects to the iPad as this will help increase speed for typing when students are typing out drafts or outlines.
Other activities students will be performing may include taking photos and videos, editing them, attaching them to an Evernote note and sending them to the teacher, publishing them on photo or video sharing sites such as YouTube and Photobucket, or sharing them with other students through Evernote or Google Drive. Graphics arts applications for the tablet come in extremely handy for creating and editing visual artwork.
Once the students have created files or documents, they can be stored in Evernote (as a note) or in Google Drive – depending on the type of assignment. Both Evernote and Google Drive use a process called optical character recognition (OCR) to analyze the text in documents and images to add to the searchable database. This process does take a little time to complete and it may be a few hours before the files are completely searchable in Evernote or Google Drive.
Note: A premium Evernote account will speed up the OCR process – however Google Drive has OCR for all accounts. https://support.google.com/drive/bin/answer.py?hl=en&answer=176692
4. Share back to the teacher
Once all of the work has been completed, each student will now have many files, documents, images, video files, etc. All of this work needs to be sent to the teacher so it can be examined and graded. This is a simple process as each student can attach all their work to one single Evernote note and save this note to a notebook that is shared with only the teacher. Or they can just drop their results into a Google Drive folder (which is automatically synced with Evernote notebook via cloudHQ). Here is an outline of how this can be accomplished:
Science teacher’s notebook: shared with science class students Jason, Kelly and Mark, but read-only access is granted so the students cannot edit or delete the files.
Jason’s science notebook: read and write access granted to student.
Kelly’s science notebook: read and write access granted to student.
Mark’s science notebook: read and write access granted to student.
Teachers can access the students’ notes, edit them or provide feedback, and save the note. The teacher can also attach feedback and comments in a PDF file or other document by attaching the file to the note.
The final grades can be put in Science teacher’s notebook (which is read-only so students cannot change their grades :))
Other useful applications
Goodreader: This is an excellent app that is useful for a variety of actions. Annotation features are top-notch and it has a complete file manager. It connects with all major cloud storage services, as well as custom storage services such as intranets. It can open any file from Evernote, and once the file has been annotated, it saves and reopens the file in Evernote.
Noteshelf: Allows the use of handwriting on a tablet by using a finger or a stylus. Using fingers will not create very high-quality handwriting but it will work. With a stylus, the handwriting is of much higher quality and can be created smoothly. It also allows students to take a photo or screenshot from the app, zoom in for better handwriting and export the file through Evernote, Dropbox, email and other apps and services.
WordPress: WordPress is an extremely popular application for a number of reasons. It’s most well-known for its blogging features which allow students to create blogs, portfolios and even learning communities. The WordPress app is easy, simple to use and is extremely efficient. This makes creating web content a snap for most students as they will only be required to know minimal code.