SharePoint, Microsoft’s web-based collaboration and document management platform, is widely used by businesses for content creation and management. To meet data backup and reporting requirements, organizations often need to transfer SharePoint files to external storage solutions like Amazon S3. In this article, we will provide you with a comprehensive guide on how to backup SharePoint to Amazon S3, ensuring the security and accessibility of your valuable data.
Table of Contents
- Introduction to SharePoint and Amazon S3
- Understanding the Need for SharePoint Backup
- Preparing Amazon S3 for SharePoint Backup
- Configuring SharePoint for Backup
- Creating a Sync Pair: SharePoint to Amazon S3
- Monitoring the Backup Status
- Verifying the Initial Synchronization
- Automating Real-Time Backup
- Setting Up Amazon Glacier for Archive Storage
- Additional Tips for Successful SharePoint Backup
- Conclusion
- References
1. Introduction to SharePoint and Amazon S3
SharePoint is a powerful collaboration and document management platform developed by Microsoft. It allows organizations to create, manage, and share content across teams and departments, enhancing productivity and simplifying communication. With features like secure document storage, real-time collaboration, and robust permission settings, SharePoint provides a comprehensive solution for businesses of all sizes.
On the other hand, Amazon S3 (Simple Storage Service) is a scalable cloud storage service offered by Amazon Web Services (AWS). It provides secure, durable, and highly available storage for various data types. Organizations can leverage Amazon S3 to store their SharePoint backups securely, ensuring data integrity and accessibility.
2. Understanding the Need for SharePoint Backup
Data loss or corruption can occur due to various reasons such as accidental deletion, hardware failure, software bugs, or cyber-attacks. To mitigate these risks, it is essential to have a reliable backup strategy in place. SharePoint backup ensures that your critical files and documents are protected and can be restored in case of any data loss incidents.
By backing up your SharePoint data to Amazon S3, you can benefit from the durability, scalability, and cost-effectiveness of cloud storage. Amazon S3 provides redundant storage across multiple data centers, eliminating the risk of data loss due to hardware failures or natural disasters. Additionally, it offers flexible storage plans, allowing organizations to scale their backup storage as their data grows.
3. Preparing Amazon S3 for SharePoint Backup
Before you start backing up your SharePoint data to Amazon S3, you need to complete a few preparatory steps. These steps include creating an appropriate Amazon S3 bucket, setting up an Amazon AWS IAM user, and configuring Amazon Glacier policies if you plan to use it for archiving. Let’s go through each step in detail: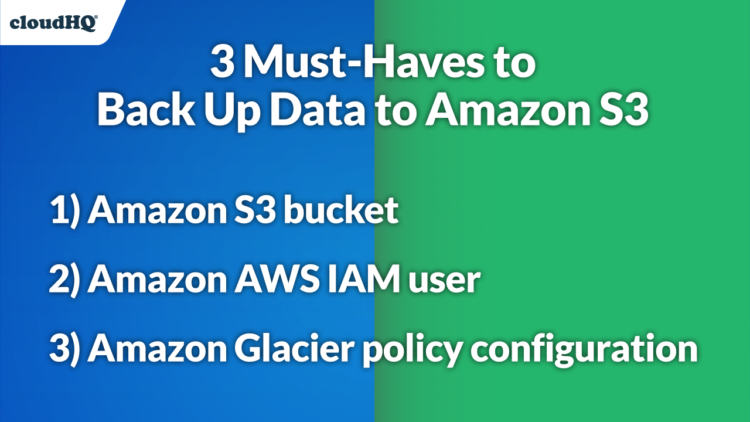
3.1 Create an Amazon S3 Bucket
To store your SharePoint backups, you need to create an Amazon S3 bucket dedicated to this purpose. Follow these steps to create a bucket:
- Log in to your Amazon AWS console.
- Navigate to the Amazon S3 service.
- Click on the “Create bucket” button.
- Provide a unique and descriptive name for your bucket.
- Choose the region where you want to store your backup data.
- Configure additional settings like block public access, versioning, and logging according to your requirements.
- Click on the “Create” button to create your Amazon S3 bucket.
3.2 Set Up an Amazon AWS IAM User
To authorize cloudHQ to access your Amazon S3 bucket for backup, you need to create an Amazon AWS IAM user. Follow these steps to create an IAM user:
- Log in to your Amazon AWS console.
- Navigate to the IAM (Identity and Access Management) service.
- Click on the “Users” tab.
- Click on the “Add user” button.
- Provide a name for your IAM user and select programmatic access as the access type.
- Set permissions for your IAM user. It is recommended to attach the “AmazonS3FullAccess” policy to enable full read-write access to your backup bucket.
- Review the user details and click on the “Create user” button.
- Save the access key ID and secret access key provided by Amazon AWS. You will need these credentials to authorize cloudHQ later.
3.3 Configure Amazon Glacier Policies (Optional)
If you plan to use Amazon Glacier for archiving older backups, you can set up the appropriate storage rules within your Amazon S3 bucket. Follow these steps to configure Amazon Glacier policies:
- Log in to your Amazon AWS console.
- Navigate to the Amazon S3 service.
- Click on the name of your backup bucket.
- Click on the “Management” tab.
- Select the “Lifecycle” configuration option.
- Click on the “Add lifecycle rule” button.
- Define the rule for transitioning objects to Amazon Glacier based on your requirements. For example, you can set a rule to move objects older than three months to Glacier for long-term storage.
- Save the lifecycle rule and apply it to your backup bucket.
4. Configuring SharePoint for Backup
Before you can start backing up your SharePoint data, you need to authorize cloudHQ to access your SharePoint site. Follow these steps to configure SharePoint for backup:
- Log in to your cloudHQ account.
- Navigate to the “Cloud Accounts” tab.
- Click on the “Add SharePoint” button.
- Enter the required credentials to authorize cloudHQ to access your SharePoint site.
- Follow the on-screen instructions to complete the authorization process.
5. Creating a Sync Pair: SharePoint to Amazon S3
Once you have authorized cloudHQ to access your SharePoint site and Amazon S3 bucket, you can create a sync pair to backup your SharePoint data. A sync pair defines the source (SharePoint) and target (Amazon S3) for the backup process. Follow these steps to create a sync pair:
- Start the synchronization wizard in your cloudHQ account.
- Click on the SharePoint icon to select SharePoint as the source cloud account.
- Choose the SharePoint document library and folder that you want to sync.
- If you can’t find the SharePoint library, click on the “Search” or “Enter Site URL” button to locate it.
- Click on the Amazon S3 icon to select Amazon S3 as the target cloud account.
- Select the appropriate Amazon S3 bucket or folder within the bucket where you want to store your SharePoint backup.
- Configure additional options according to your backup requirements.
- Click on the “Next” button to start the synchronization process.
6. Monitoring the Backup Status
After creating the sync pair, you can monitor the backup status in your cloudHQ account. CloudHQ provides real-time status updates, allowing you to track the progress of your SharePoint backup. Follow these steps to monitor the backup status:
- Log in to your cloudHQ account.
- Navigate to the “Synchronization” tab.
- Locate the sync pair you created for SharePoint backup.
- Check the synchronization status, which will be displayed after the initial synchronization.
- You can also enable email notifications to receive updates on the backup progress.
7. Verifying the Initial Synchronization
Once the initial synchronization is complete, it is essential to verify the backup data in your Amazon S3 bucket. Follow these steps to ensure the successful backup of your SharePoint files:
- Log in to your Amazon AWS console.
- Navigate to the Amazon S3 service.
- Click on the name of your backup bucket.
- Navigate through the folder structure to locate the SharePoint backup folder.
- Verify that all the files and folders from your SharePoint document library have been successfully backed up to Amazon S3.
8. Automating Real-Time Backup
To ensure continuous data protection, you can set up real-time backup for your SharePoint data. With real-time backup, any changes made to your SharePoint files will be automatically synchronized with your Amazon S3 bucket. Follow these steps to automate real-time backup:
- Log in to your cloudHQ account.
- Navigate to the “Synchronization” tab.
- Locate the sync pair you created for SharePoint backup.
- Click on the “Edit” button to modify the sync pair settings.
- Enable the real-time backup option.
- Save the changes to apply the real-time backup configuration.
9. Setting Up Amazon Glacier for Archive Storage
If you want to archive older backups to Amazon Glacier, you can configure the appropriate storage rules within your Amazon S3 bucket. Follow these steps to set up Amazon Glacier for archive storage:
- Log in to your Amazon AWS console.
- Navigate to the Amazon S3 service.
- Click on the name of your backup bucket.
- Click on the “Management” tab.
- Select the “Lifecycle” configuration option.
- Click on the “Add lifecycle rule” button.
- Define the rule for transitioning objects to Amazon Glacier based on your requirements. For example, you can set a rule to move objects older than three months to Glacier for long-term storage.
- Save the lifecycle rule and apply it to your backup bucket.
10. Additional Tips for Successful SharePoint Backup
To ensure a successful SharePoint backup to Amazon S3, consider the following tips:
- Regularly monitor the backup status and resolve any synchronization errors promptly.
- Test the restore process periodically to ensure the recoverability of your SharePoint data.
- Implement a secure access control policy for your Amazon S3 bucket to protect your backup data from unauthorized access.
- Consider encrypting your SharePoint backups to add an extra layer of security.
- Implement version control to track changes made to your SharePoint files and enable easy restoration of previous versions if needed.
11. Conclusion
Backing up your SharePoint data to Amazon S3 is a crucial step in ensuring the safety and availability of your critical information. By following the step-by-step guide provided in this article, you can establish a robust backup strategy for your SharePoint files. Remember to regularly monitor the backup status, automate real-time backup, and consider archiving older backups to Amazon Glacier for long-term storage. With the right backup solution in place, you can protect your SharePoint data and restore it effortlessly in case of any data loss incidents.