If you’re like most people, you probably don’t spend a lot of time customizing the settings on your email client. You may have just assumed the default Gmail interface was the best it could possibly be. However, thanks to Gmail’s new interface there are tons of new ways to customize the email platform that will help make communication with your colleagues a lot smoother.
This article will show you some of the different ways that you can change the settings on your new Gmail interface to make it more user-friendly.
How To Switch To The Updated Gmail Interface
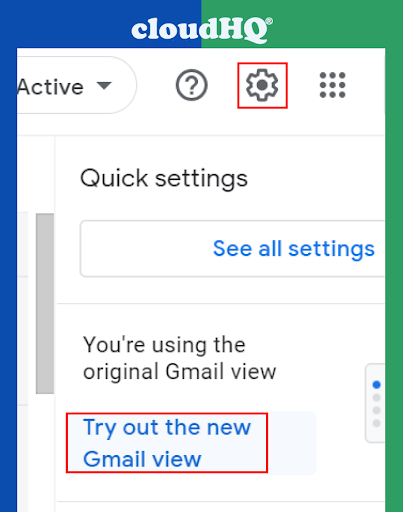
To switch to the new Gmail interface, follow these steps:
- Open Gmail
- In the top right corner, click the Settings gear
- Select Settings from the menu
- Scroll down and click the “Try the new Gmail” radio button
- Click Save Changes at the bottom of the page.
Now that you’ve switched to the new interface let’s take a look at some of the ways that you can customize it.
How to Change Your Inbox Layout
The layout settings allow you to choose between a standard view and an expanded view. The standard view is what you see when you first switch to the new interface, while the expanded view includes more information on each email message.
Changing The Layout Density
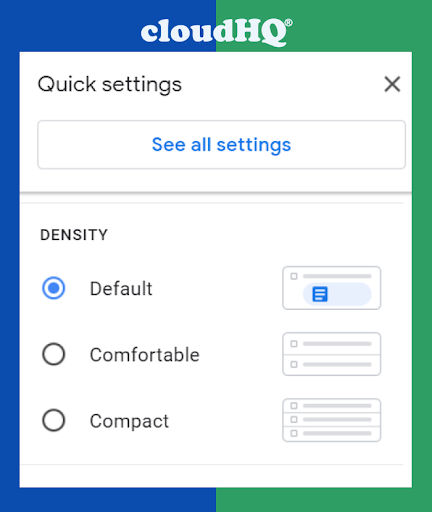
To change your layout setting, follow these steps:
- Open Gmail.
- In the top right corner, click the Settings gear. A “Quick Settings” sidebar will appear.
- Scroll down and click the “Density” section.
- Choose between the default, comfortable, or compact layout options.
- Close the “Quick Settings” sidebar.
You can also change your reading pane position and your inbox type.
The reading pane is the column on the right-hand side of the Gmail interface where you view your email messages. The inbox type setting allows you to choose between a default inbox layout and a few other options.
Changing The Reading Pane Position
To change your reading pane position or your inbox type, follow these steps:
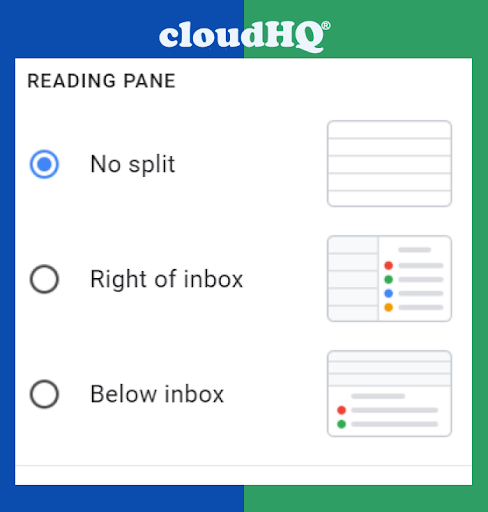
- Scroll down in the “Quick Settings” sidebar and click the “Reading Pane” section.
- Choose between the “no split,” “right of inbox,” and “below inbox” reading pane positions.
- The “no split” position leaves the reading pane at the top of the Gmail interface. The “right of inbox” position puts the reading pane on the right-hand side of the interface, and the “below inbox” position puts it at the bottom.
- Close the “Quick Settings” sidebar.
Changing The Inbox Type
To choose your inbox type, follow these steps:
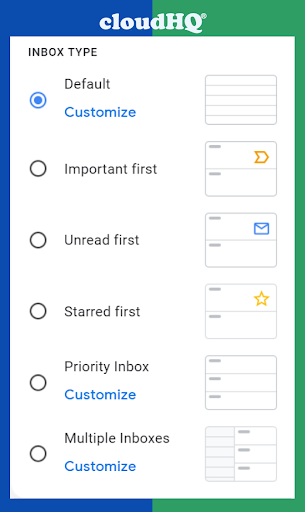
- Scroll down in the “Quick Settings” sidebar and click the “Inbox Type” section.
- Choose between the “Default,” “Important First,” “Unread First,” and “Starred First” inbox types.
- There are also options for “Important first” or “Priority Inbox,” which are email inboxes that have been specifically tailored to show you the most important messages first.
- Configure your chosen inbox type and close the “Quick Settings” sidebar.
Chat, Spaces, and Meet
The new Gmail interface also has a new sidebar on the left, allowing users to switch between Mail, Chat, Spaces, and Meet.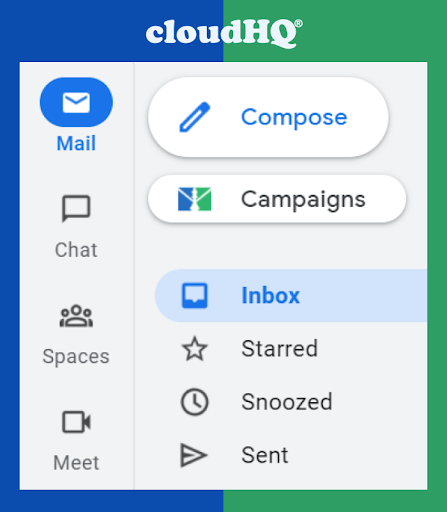
The Mail section is where you’ll find all of your email messages. The Chat section is where you’ll find all of your chat conversations. The Spaces section allows you to create separate workspaces for different projects. And the Meet section allows you to schedule and join video conferences.
If you get a new email, chat, or call, you’ll see a notification bubble appearing on the buttons, which eliminates the need to switch between different Google communication tools.
When you click a button in the new sidebar, it will open up a full-screen interface of that specific tool. This will make it easier for you to use multiple tools at the same time.

Plus, the hamburger menu in the top left corner gives you quick access to navigation panes of Mail, Chat, Spaces, and Meet.
Conclusion
The new Gmail interface offers several new ways for you to customize the software to fit your specific needs. You can change the layout, density, reading pane position, and inbox type. The new sidebar on the left allows you to switch between Mail, Chat, Spaces, and Meet. Although there is an upfront time investment, overtime changing your layout can save you dozens of hours of time and headaches in the future.