cloudHQ · Prevent Emails From Going to Spam (Gmail)
Table of Contents
The algorithm that Google uses to determine whether or not an email goes to spam is a black box. There’s no way we can really comprehend how it truly works, but there are definitely tips and tricks you can use to minimize the chance that your email gets sent to spam.
It is also important to note that not all email services are the same, messages marked as spam on Gmail may not be classified as spam by other services such as Hotmail, Yahoo, or Outlook.
Why Some Emails Land In Gmail’s Spam Folder

There are numerous reasons why some emails end up in the spam folder. This ranges from protection against scams and phishing to keywords that trigger spam filters to incorrect permissions.
Gmail automatically flags emails that appear suspicious as spam as a security measure. Listed below are some reasons why emails can end up in the Spam folder:
- Email is sent from an address that is not in your Google contact.
- When emails are sent from the same account but multiple IP addresses.
- Emails with purchase details or promotional links are likely to be flagged.
- Emails from unknown addresses.
- When an email address has been marked spam by others.
How To Prevent Your Emails From Going to Spam in Gmail
You can’t control which incoming message gets marked as spam or whether it arrives in your inbox, but you can stop emails from someone or a specific type of email from going to Spam in the future.
1. Unmark an Email as Spam
Follow the steps below to mark an email as “Not spam.”
STEP 1.
Open Gmail and click on the Spam folder on the left sidebar. If you can’t see the Spam folder at first glance, click the “More” tab option on the left sidebar, and the “Spam” folder will appear. 
STEP 2.
Now that you are in the Spam folder, select and open the message you want to mark as “Not spam”.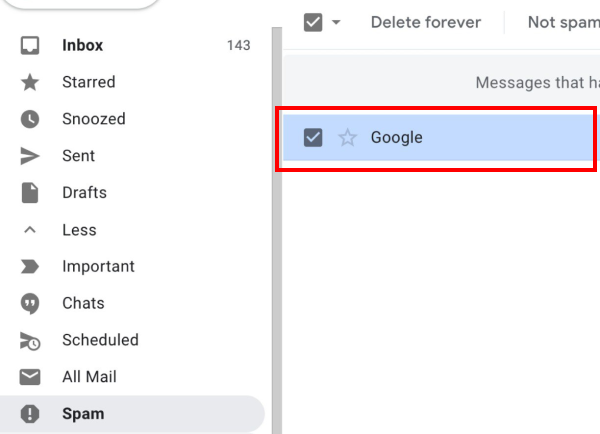
STEP 3.
When the email is opened, click on the “Not spam” button at the top of the page. 
STEP 4.
After selecting “Not spam”, the email should move into your inbox and you may receive subsequent emails from the sender directly into your Gmail inbox. In cases where subsequent emails do not land in the inbox, you may need to go back to spam and select some emails from the sender and mark them as “Not spam”; that way Gmail knows the email is important. 
2. Add an Email Sender as Your Contact Inside Gmail
Another way to prevent Gmail from sending your important emails to the spam folder is to save the sender’s email address to your Google Contacts. After you just have saved the contact, Gmail will cease to mark the emails from this contact as spam and their emails will be sent directly to your inbox where you can access them.
Here is how to add an email address to your contact:
STEP 1.
Open Gmail and select the Spam folder on the left sidebar. 
STEP 2.
In the Spam folder, select a message sent from the email address you wish to save.
STEP 3.
When the window opens up, hover the cursor over the sender’s email address at the top left and you will see a drop-down window appear. Inside this window, click on the Add to contacts icon. 
3. Stop Emails From Going to Spam with a Filter
If you have an email in your spam folder and you want to prevent subsequent emails of the same nature to stop going into spam, you can simply create a custom filter, this will make Gmail learn to automatically send such messages or messages with similar content into your inbox. This way, Gmail will stop sending important emails to the spam folder.
Before you create a custom filter that will prevent messages from going into the spam folder, you need the important message from the pool of messages in your spam folder.
STEP 1.
Open Gmail on a web browser and select Spam on the left sidebar. 
STEP 2.
Inside the Spam folder, select the important message in full view.

STEP 3.
After the message opens, click on the three dots icon at the top right side of the screen.
STEP 4.
In the menu that appears, select “Filter messages like this”.
STEP 5.
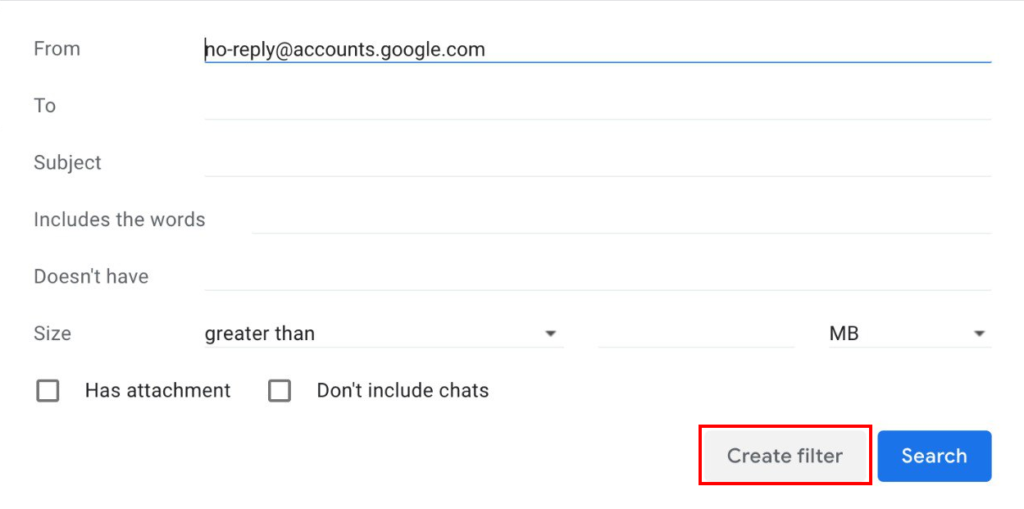
Advanced search options will be opened under the search bar and in the background, there, you will see all the messages that have similar content and that are from the same sender as the one you have selected. If you want to modify the search parameters, do that on this screen and then click on “Create Filter”.
STEP 6.
A list of actions will pop up that you can modify to tell Gmail what to do when receiving messages like these. Check the “Never send it to Spam box” box from the options.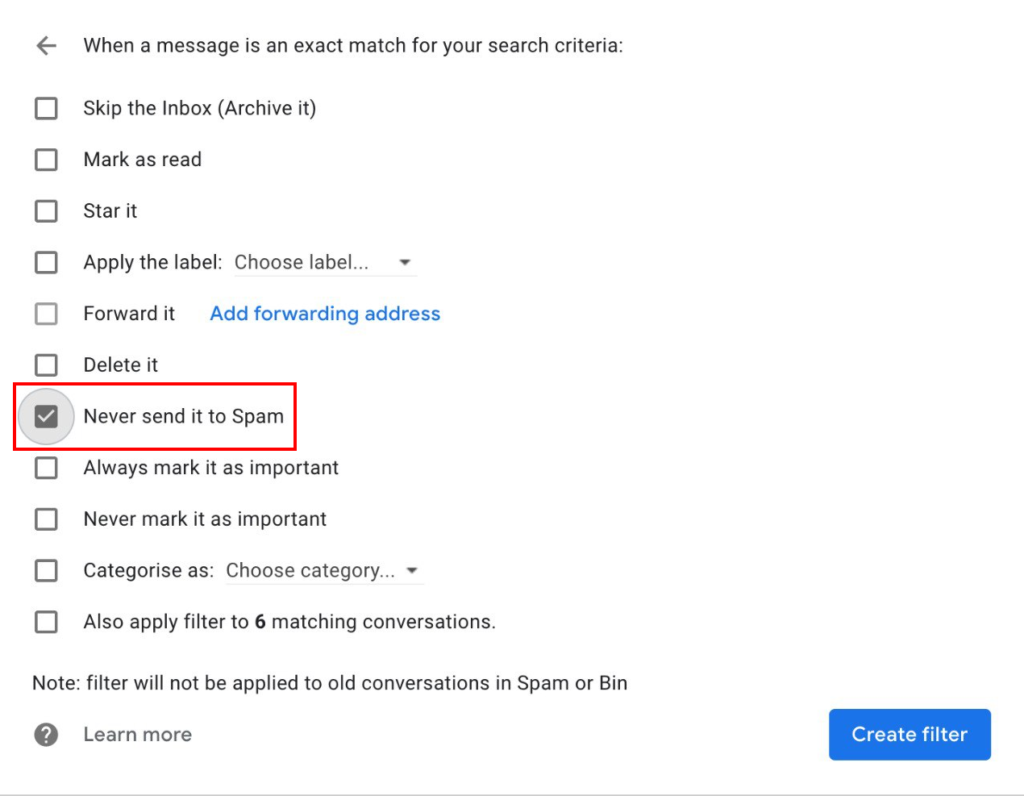
STEP 7.
Gmail now has the idea that such messages should not be sent to spam anymore.
In case you want to tell Gmail that these messages are important, you can also check the “Always mark it as important” box on the list of options and click “Create filter”.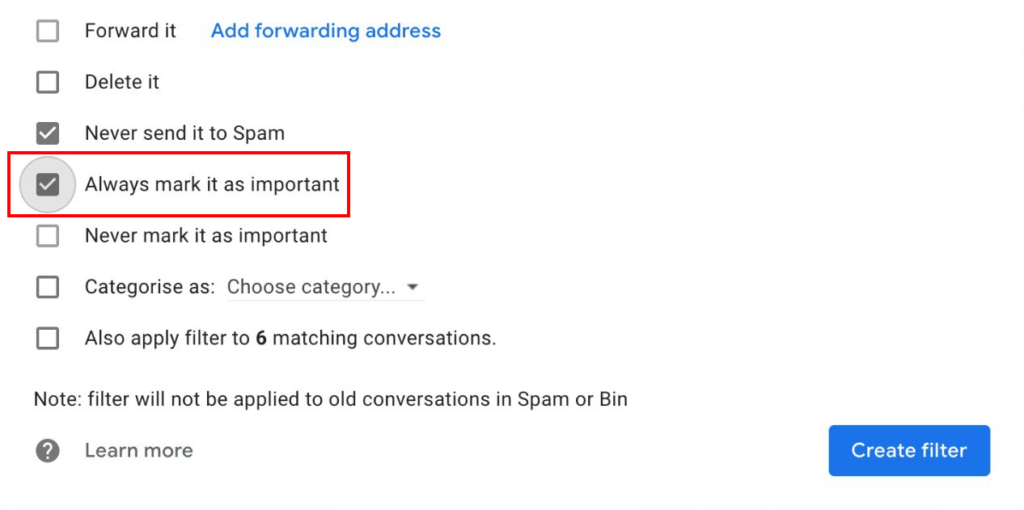
STEP 8.
A “Your filter was created” banner will appear at the bottom left corner of the screen. 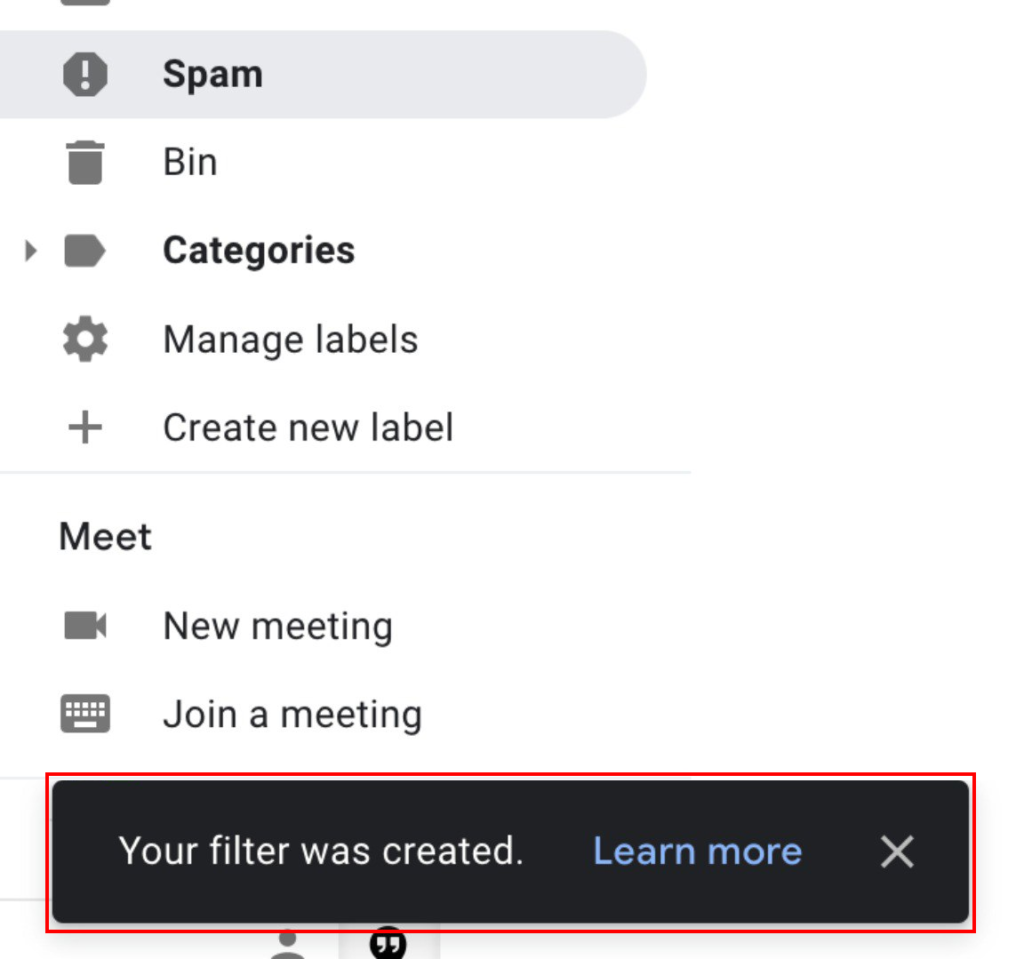
Once you have created a filter using any of the 3 methods. Gmail will start sending future messages from the sender or the related important messages directly to the inbox.
Method 3 can also be used to create filters for other messages you have in the Spam folder and use it to move them to your inbox.
[BONUS] 10 More Tips To Prevent Mail to Gmail Users From Being Blocked / Sent to Spam
Using the methods above may prevent you from having your emails sent to a spam folder within Gmail, but what about preventing your emails from going to someone else’s spam folder? Follow these tips to avoid such a situation.
- Don’t send emails with a variety of content all in the same email. If you would send an email with promotional content, don’t include purchase links.
- If you have multiple types of content, use one email address for each type.
- If you regularly send emails to your customers and clients, including an unsubscribe link should prevent spam filters on Gmail from marking these emails as spam.
- Brands should avoid making errors or typos inside promotional emails so that Gmail doesn’t sort them into spam.
- You should use more text instead of images because the latter is correlated to spam.
- It is best to avoid email subject lines containing all capital letters and exclamation marks.
- Don’t attach excessive or unnecessary files to your emails, as they may be marked as spam if they contain viruses or spyware.
- Sending emails from another domain or company should be avoided.
- Do not send regular emails to users who did not subscribe to your content.
- Consider Google’s recommended practices when sending emails to multiple users.
[BONUS] 3 Technical Tips to Prevent Emails From Going to Spam
A. Bounced Email Monitoring
When sending email campaigns, it’s always important to clean out bounced email addresses from your email list. Your goal should always be to stay below a 3 percent bounce rate, otherwise Google penalizes your sender reputation.
MailKing automatically detects bounced emails and deletes them, but other email marketing software providers may not. If yours doesn’t automatically detect and delete bounced emails, you cloudHQ’s free email bounce checker in Export Emails to Google Sheets. The app automatically exports all bounced emails into an organized Google Sheet report for you.
B. SPF, DKIM & DMARC Verification
SPF, DKIM and DMARC are a set of email authentication technologies. They provide proof that senders are truly authorized to send email from a particular domain to ISPs. They prevent spam, spoofing & phishing with Gmail authentication.
When using Google Workspace, you can:
- Ensure mail delivery & prevent spoofing with SPF.
- Increase security for outgoing emails with DKIM.
- Enhance security for forged spam with DMARC.
- Add your brand logo to DMARC-authenticated messages.
Google has an admin toolbox check to check your settings for you. Just enter your domain name and wait to see if your domain gets all green checkboxes. For example, cloudHQ’s toolbox check looks like this: 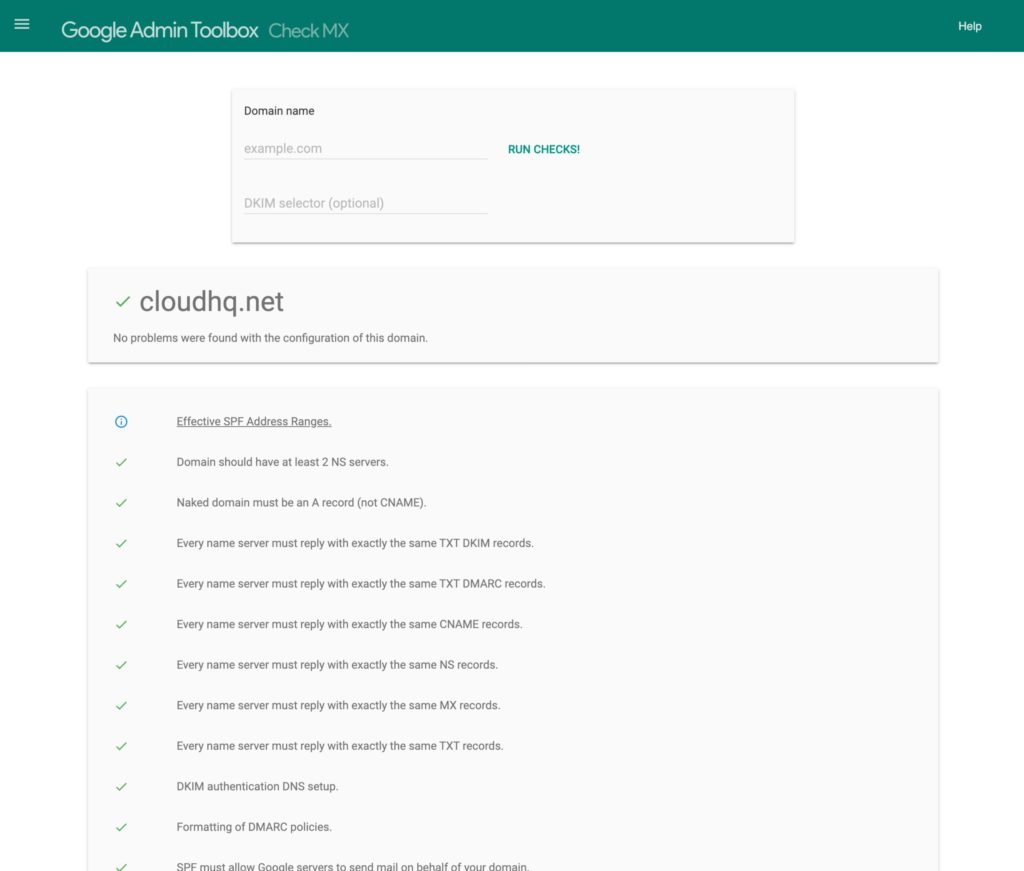
For setup instructions, you can view Google’s support page here.
C. Reverse DNS records of your IP address
Setting up valid reverse DNS records of your IP address is easy to do so that your address can point to your domain. If you don’t have a website for your domain, you can create one with Wix, Squarespace, etc.
You should also update your contact information with WHOIS record and abuse.net.
For even more tips, check out cloudHQ’s support page here.