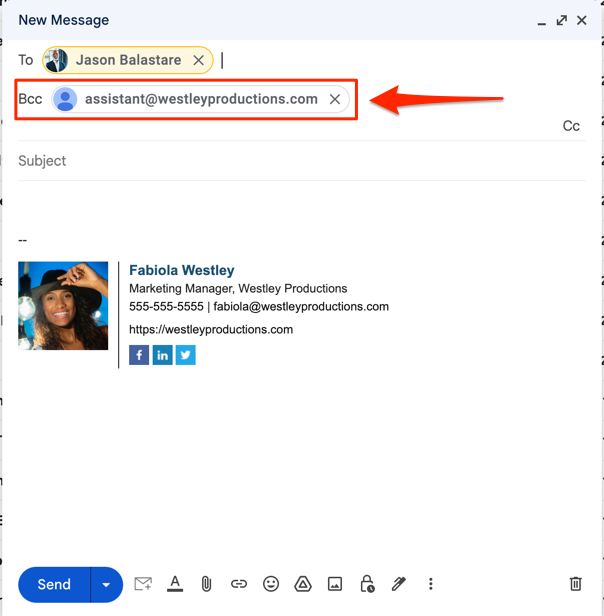
BCC is one of the best features on Gmail and it allows you to keep people in the loop without necessarily informing the primary recipient of the email. In many workplaces, it is essential to BCC certain authority figures in all work emails to keep them informed and allow them to intervene if the need arises. Therefore, BCC is a highly important and useful feature that is used quite a lot for work correspondence.
While BCC is quite useful, manually entering emails to BCC in every email can get tiring real quick, especially if you are adding the same email addresses to the BCC field each time. Thankfully, there is now an extension to help automate the process. This article discusses in detail the benefits and functionality of the Auto BCC for Gmail extension by cloudHQ and how users can incorporate it into their Gmail.
Why Would You Need Auto BCC for an Email?
BCC stands for blind carbon copy and it allows a user to add an email address to their correspondence. However, other people in the email are able to see the person whose email address has been entered in the BCC field. The appeal of adding an anonymous third party to your email is clear and has its uses in multiple scenarios, such as adding your lawyer to an email related to legal matters or adding your boss to a work email. An authority monitoring an email is highly useful; therefore, the BCC feature gets a lot of use in multiple instances.
However, the examples mentioned previously are one-off instances, and the question arises why someone would need to Auto BCC their emails. Auto BCC is highly useful in work environments. Automatically sending a blind copy to another email address can help create a backup for your emails.
Some workplaces also require employees to BCC their manager or supervisor on every work email they send. Therefore, Auto BCC can be extremely helpful in this instance. You can also auto BCC email to Customer Relationship Management Software to keep a record and bring other team members up to speed.
How to Use The Auto BCC for Gmail Extension by cloudHQ
Now that we have established just how useful it is to auto BCC emails, it is time to learn how to conveniently add the Auto BCC for Gmail extension by cloudHQ to your Gmail and make work emails easier.
Here are the steps you need to take to automatically add an email address to the BCC field in all your emails:
1. Download the Auto BCC for Gmail extension from the Chrome Web Store
Click the “Add to Chrome” button and add the extension to your Chrome webpage.

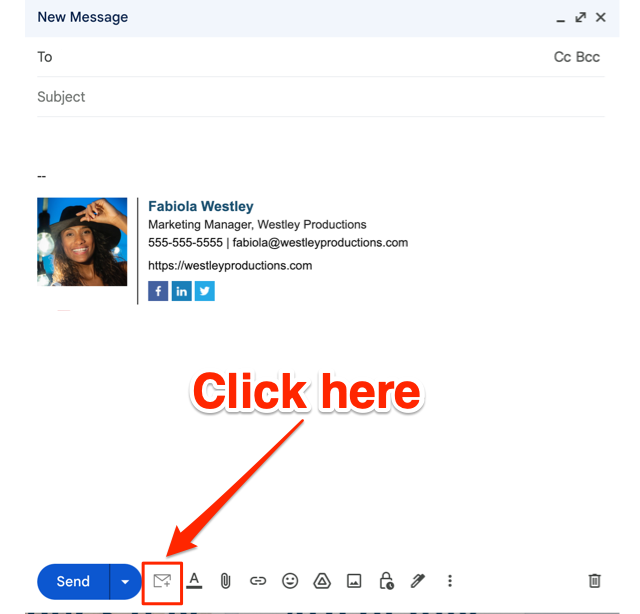
2. Click The Envelope Icon at the Bottom of Compose Box
Click on your new envelope icon on the bottom of your email compose box to configure auto BCC or auto CC rules.
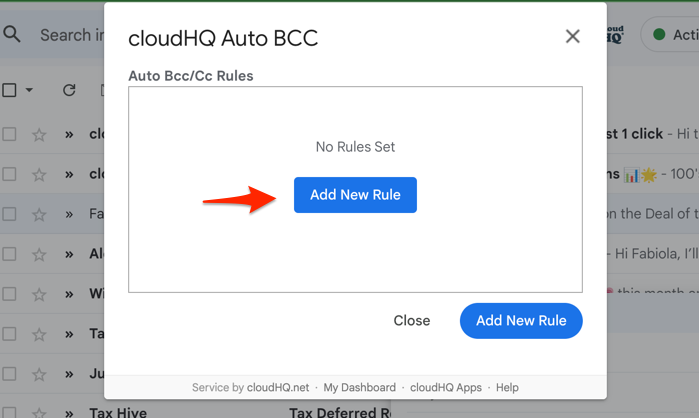
3. Click the Add New Rule Button
The “Add New Rule” button will take you to set the parameters for the emails that will automatically have a BCC (or CC).
4. Add an Email Address to Auto BCC / CC
You can set up your auto BCC or auto CC rules:
- To everyone, but not to: [enter email address]
- To only these recipients: [enter email address]
- To anyone [no email addresses to enter]
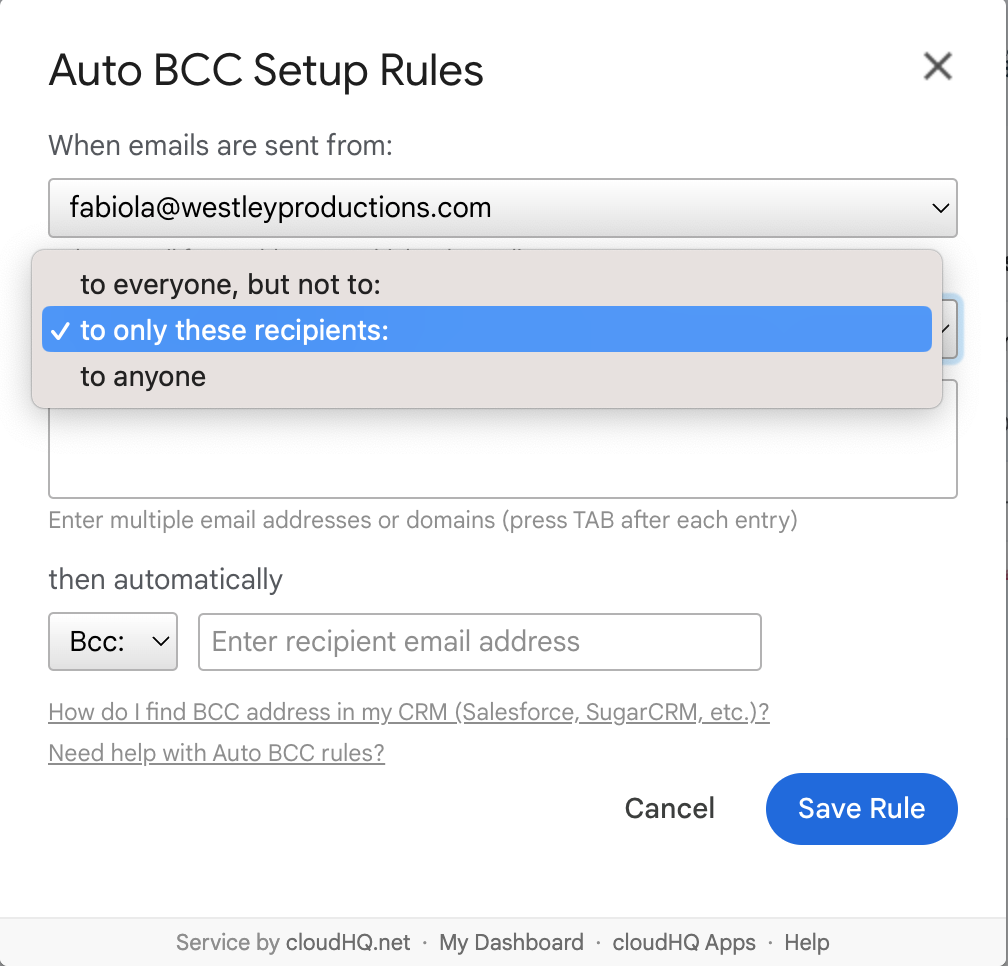
Select what you want to create. For this example, we’ll add the email that you want automatically BCC’ed when I email a certain email address.
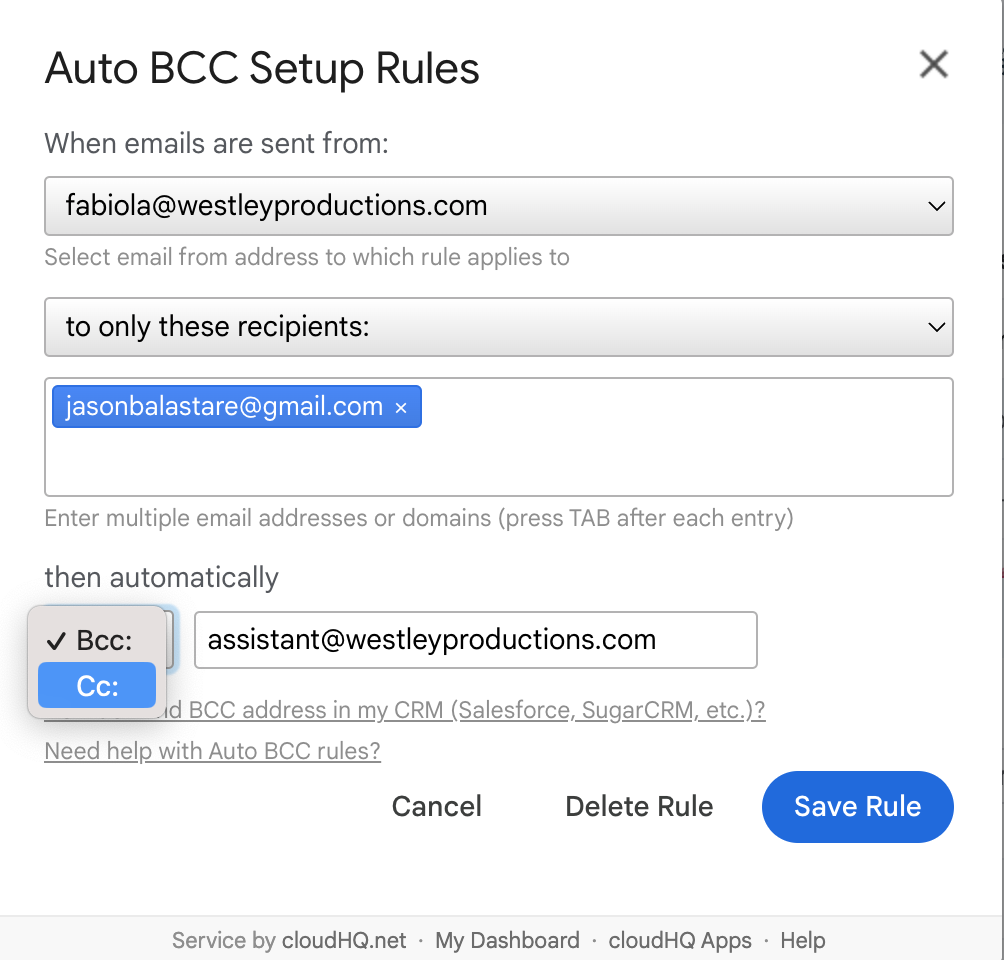
You can also select the drop down in the BCC box to select the CC option if that’s your preference. In the example below, the copy function just copies the assistant email address, and the BCC option blind copies the assistant email address.
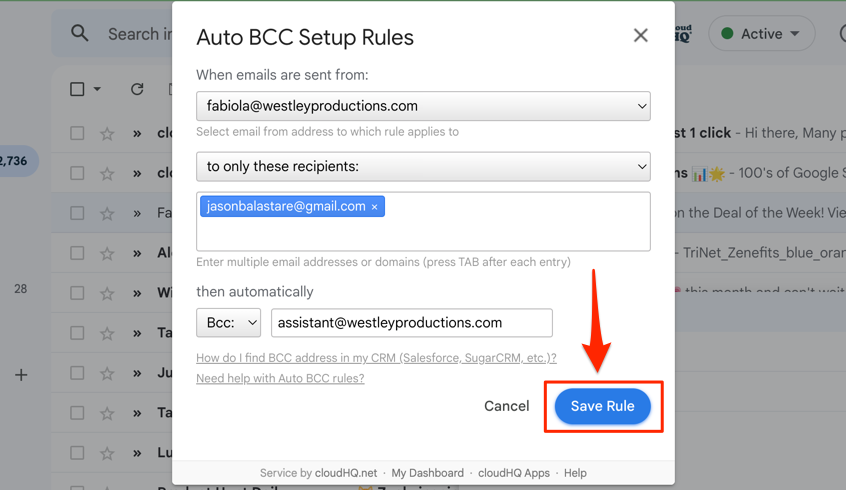
Save the rule when you have the rule set up the way you want.
Never Forget to BCC or CC Someone Ever Again
With the amount of responsibility we’re facing everyday in our jobs and in our personal lives alike, it’s easy to forget to BCC or CC someone on an email. Using this app, you’ll never forget to BCC or CC anyone ever again.
